
 By
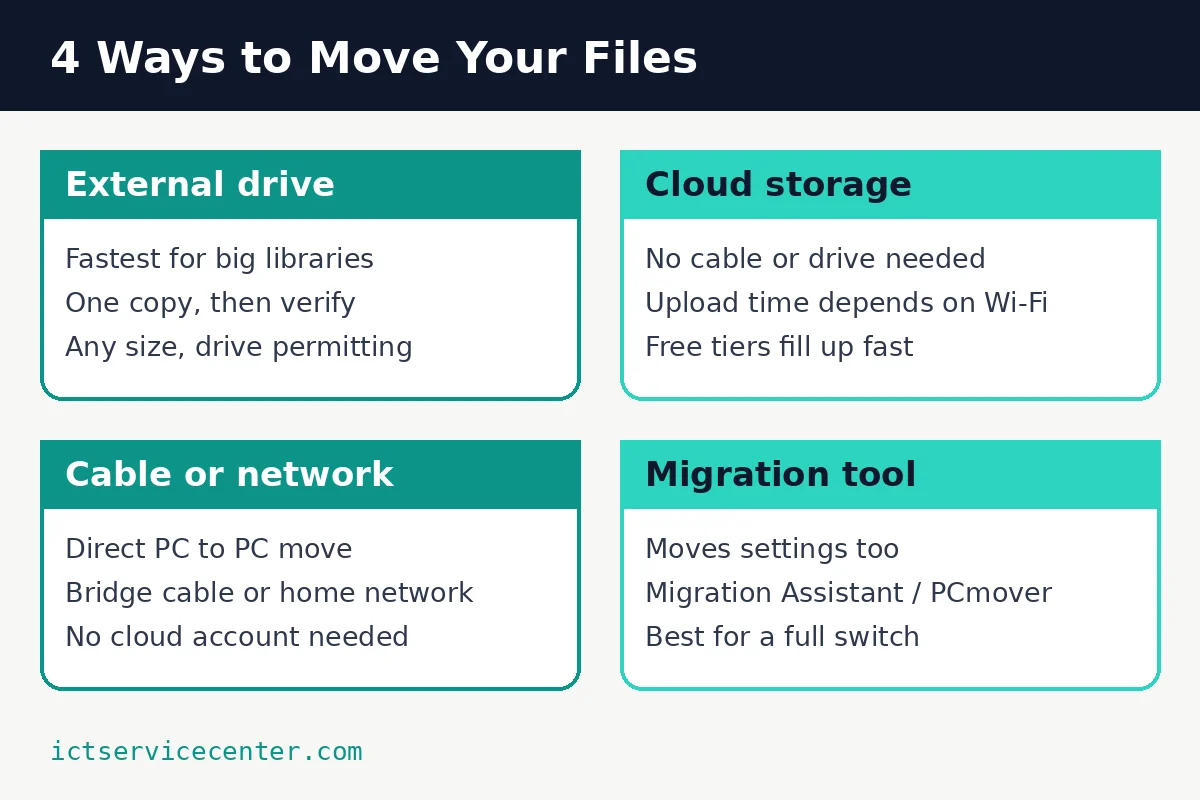
The fastest way to transfer files from an old laptop to a new laptop is a portable SSD: copy your folders onto it, plug it into the new machine, and copy them off. Smaller libraries can go through OneDrive, Google Drive or iCloud instead, and every Mac has Migration Assistant built in.
In short: Pick a route below: a drive, the cloud, a cable or network share, or a migration tool. Always copy your files, never cut them, so the old laptop keeps a full set until you have checked the new one. A copy moves documents, photos and downloads, not installed programs or Windows itself.
Key takeaways
- An external drive is fastest for big libraries. Cloud storage is easiest for small ones.
- Copy, do not move. The old laptop is your safety copy until the final checks pass.
- Installed programs, most license keys and Windows itself do not travel with a file copy.
- Migration Assistant (Mac) and PCmover (Windows) move accounts and many settings too.
Choose by three things: how much data you have, your upload speed, and whether accounts and settings must move too. Windows 11 has no built-in tool for copying folders straight from one PC to another over a cable, so the Windows routes are a drive, the cloud, a network share or a paid migration program. Loaders in this spot often ask about how usb moves data as well.
| Method | Speed | Cost | Practical size limit |
|---|---|---|---|
| External drive | Fastest in most homes | A drive you own or buy | The size of the drive |
| Cloud storage | Set by your upload speed | Free tiers of 5 GB to 15 GB, paid plans above | Your plan storage |
| Transfer cable or network share | Medium to fast | Cable costs money, network is free | No fixed limit |
| Migration tool | Set by Wi-Fi or cable | Free on Mac, paid on Windows | No fixed limit |
Before you start: measure, back up, plug in
Find out how much you are moving. On Windows, open File Explorer, right-click Documents, and choose Properties for its size. Repeat for Desktop, Downloads, Pictures and Videos. Under your cloud limit, use the cloud; far above it, use a drive. On a Mac, use Finder > Go > Home and Get Info.
Back the old laptop up before you touch anything. Transfer day is the worst day to find out the old drive is failing. Our walkthrough of how to back up laptop data covers the copy step by step, and the best backup methods for a laptop compares the options.
Copy, never cut. If a transfer stalls or a cable slips out, a copied file still exists on the old laptop. A cut file in mid-transfer can end up in neither place. Delete nothing from the old laptop until the final checks pass.
Plug both laptops into power and leave them plugged in. A laptop that sleeps or dies mid-copy leaves a half-copied folder behind. More basics like this live in the Basics & How It Works hub.
Method 1: Copy everything with an external drive
Pick this route for large libraries, slow internet, or both. A portable SSD is quick and reusable; a spinning drive is slower but fine for one-off moves. Size the drive to your measured total, with room to spare.
- Plug the drive into the old laptop. Open File Explorer > This PC and double-click the drive.
- Open your user folder in a second window. Select Desktop, Documents, Downloads, Pictures, Music and Videos, press Ctrl + C, click into the drive window, and press Ctrl + V.
- When the copy finishes, right-click each folder on the drive, choose Properties, and check file count and size against the originals.
- Eject properly: click Safely Remove Hardware and Eject Media in the notification area, choose the drive, and unplug when Windows says it is safe.
- Plug the drive into the new laptop and copy each folder into its matching folder, Documents into Documents and so on.

USB 3.2 Gen 2 rated up to 10 Gbps, pocket sized, and big enough for most photo and video libraries in one copy.
- Create; Explore; Store; The T7 Portable SSD delivers fast speeds and durable features
- Don’t waste a second waiting and spend more time doing; The T7 is embedded with PCIe

Watch the Replace prompt. Copying into a folder that already holds same-name files triggers a choice. Replace overwrites the copies on the new laptop for good; they do not go to the Recycle Bin. If the new laptop holds newer versions of anything, choose Skip for those files, or copy into a staging folder instead.
If the old laptop will not start, its drive can often be read in a USB enclosure. Our guide to upgrading a laptop SSD shows how it comes out. Power off and unplug first. If the drive is encrypted and you lack the recovery key, use a repair shop. We go through understanding storage architecture step by step in its own article.
Any USB drive can do this job. Our explainer on what an external storage device is covers the types, and our SSD vs HDD comparison explains why an SSD finishes the copy so much faster.
Method 2: Move files through cloud storage
Cloud storage suits smaller libraries and anyone happy to let an upload run in the background. New to the idea? Start with cloud backup vs local backup. Free space is the limit: OneDrive and iCloud include 5 GB free, Google Drive 15 GB.
OneDrive, for Windows to Windows
- On the old laptop, click the OneDrive cloud icon in the notification area, click the gear icon, and choose Settings.
- Go to Sync and backup, then Manage backup. Turn on Desktop, Documents and Pictures, then select Save changes.
- Wait until OneDrive reports everything synced; hover over the cloud icon for status.
- On the new laptop, sign in to OneDrive with the same Microsoft account and open File Explorer > OneDrive.
- Right-click a folder and choose Always keep on this device for a full local copy.

Microsoft covers the same settings in its guide to backing up your folders with OneDrive.
Google Drive and iCloud
Google Drive works the same way: install Google Drive for desktop on the old laptop, copy folders into the Google Drive folder, wait for sync, then install and sign in on the new laptop. From Windows to a Mac, upload with iCloud for Windows or at iCloud.com, then open iCloud Drive in Finder.
Method 3: Connect both laptops with a cable or your home network
A transfer cable is a USB cable with a bridge chip in the middle, plus software for both PCs. A plain USB cable cannot do this job; without the bridge, the two ports cannot see each other. The software shows both laptops side by side, and you drag folders across.

A bridge cable with the transfer software included, made for moving files between two Windows PCs without a drive or a cloud account.
- C to USB-A - Plugable's 3.3 ft (1M) USB C to USB A Cable offers SuperSpeed 10Gbps
- C Adapter - Bridge the gap between legacy USB-A ports and modern USB-C devices with the
The free version uses your router: the old laptop shares its folders, and the new one copies from them.
- Connect both laptops to the same router, by Wi-Fi or Ethernet cable.
- On the old laptop, open Settings > Network & internet > Advanced network settings > Advanced sharing settings. Under Private networks, turn on Network discovery and File and printer sharing.
- In File Explorer, right-click the folder to share, choose Properties > Sharing > Share, add your own account with Read permission, and click Share.
- On the new laptop, open File Explorer > Network, click the old laptop’s name, sign in with its username and password, and copy the folders across.
- Afterwards, turn sharing back off on the old laptop.
Share folders only on your own home network. Never turn sharing on over coffee shop, airport or hotel Wi-Fi. If that sounds like your bench, read up on scanning for oversized files on your system next.
If one laptop cannot see the other, check the cable and the port first. A dead port is common on older machines; our guide to fixing a USB port that is not working walks through the checks.
Method 4: Let a migration tool do the copying
Migration tools move user accounts and many settings along with the files, which the methods above do not.
Migration Assistant, for a new Mac
- Update both computers, place them near each other, Wi-Fi and Bluetooth on, both plugged into power. Migration Assistant is in Applications > Utilities on the Mac.
- On the new Mac, open Migration Assistant, or follow the transfer offer during first setup. Choose From a Mac, Time Machine backup or startup disk, or From a Windows PC for a Windows old machine.
- From Windows, first download and open Windows Migration Assistant from Apple on the PC. From an old Mac, open Migration Assistant there and choose to transfer to another Mac. Confirm the code matches on both screens.
- Tick what moves: user accounts, documents, pictures and settings. For an administrator account, set its password on the new Mac and write it down for first sign-in.
- Let it run to the end; large libraries can take hours. Quit Migration Assistant on both, sign in on the new Mac, and spot-check folders.
Apple documents this in Transfer to a new Mac with Migration Assistant and Transfer from PC to Mac with Migration Assistant.
PCmover, for Windows to Windows
Laplink PCmover is the paid tool if you also want programs and settings moved. Install it on both PCs, connect them on the same network or with its cable, and choose what transfers. Some programs still ask for a license key or fresh sign-in on the new machine.
What does not move to the new laptop
- Installed programs. Copying a program folder does not install it. Download fresh installers, and dig out license keys first. PCmover is the exception, and even it cannot move everything.
- Windows itself. The system and an OEM Windows license stay with the old machine. The new laptop uses its own copy.
- Saved passwords. They live in your browser or account, not in your folders. Turn on sync in Chrome or Edge on both laptops, or export from the old browser first.
- Email stored only on the old PC. Webmail and IMAP accounts just sign in again. Outlook mail in a local PST file travels only if you copy it, usually from Documents > Outlook Files, and open it in Outlook on the new laptop.
- Some game saves and app data. These can hide in Saved Games or hidden AppData folders. Check each game’s own cloud save first.
After the transfer: run this checklist
- Open a sample from every folder: documents, photos, a video.
- Compare totals. Right-click each main folder on both laptops, choose Properties, and match file counts and sizes.
- Sweep the forgotten places: the old Desktop and Downloads, plus any second drive such as D:.
- Reinstall your programs. Deactivate limited licenses on the old laptop only after the new one runs them properly.
- Set up a backup on the new laptop now. Leave the old one untouched for two weeks, then reset or wipe it.
Mistakes to avoid
- Cutting instead of copying. The fix: use Ctrl + C everywhere, and delete originals only after the checklist passes.
- Choosing Replace on every name clash. The fix: skip duplicates, or copy into a staging folder and merge by hand, so newer files survive.
- Copying only Documents. The fix: work through This PC top to bottom, including Downloads, the Desktop and second drives.
- Assuming copied programs will run. The fix: list your programs first, find installers and keys, and set aside reinstall time.
- Wiping the old laptop the same day. The fix: keep it untouched for a couple of weeks. It is your free second copy until then.
Frequently asked questions
Can I transfer programs from my old laptop, or only files?
A plain copy moves files only. Programs must be installed on the new laptop so the system can register them properly. PCmover on Windows and Migration Assistant on a Mac carry many programs across, but some still need a license key entered again.
How long does a transfer take?
It depends on the amount of data and the route. A few gigabytes by cloud can finish quickly on a fast upload, while hundreds of gigabytes over Wi-Fi can run for hours. A portable SSD is quickest for big libraries.
Will my bookmarks and saved passwords move with my files?
Not inside your copied folders; browsers store them separately. Sign in to sync in Chrome or Edge on the old laptop, then sign in with the same account on the new one. Without sync, export bookmarks to an HTML file and copy it across. If that sounds like your bench, read up on internal data movement explained next.
My old laptop will not turn on. Can I still get my files?
Often, yes. The drive inside is frequently fine even when the laptop is not. It can be removed and read in a USB enclosure, or a repair shop can do it for you. Power off and unplug before opening anything. If the drive is encrypted and you lack the recovery key, or it clicks and grinds, stop and get professional help.
Bottom line: Back up the old laptop, measure your folders, and pick by size: cloud for small libraries, a portable SSD for large ones. Copy into the matching folders, run the checklist, and keep the old laptop untouched for two weeks before wiping it.
Sources: Microsoft Support (OneDrive folder backup); Apple Support (Migration Assistant guides). Photos: Pexels and Unsplash.