How to Clean and Maintain Your Laptop Keyboard
Contents
I’ve lost count of the laptops I’ve revived from the brink. The most common culprit isn’t a fried motherboard or a dead drive. It’s the keyboard. A sticky ‘A’ key, a mushy spacebar, keys typing the wrong lettersthese small failures grind your workflow to a halt. We focus so much on how RAM affects laptop performance or how storage affects laptop performance, but neglect the component we physically interact with thousands of times a day. That’s a mistake.
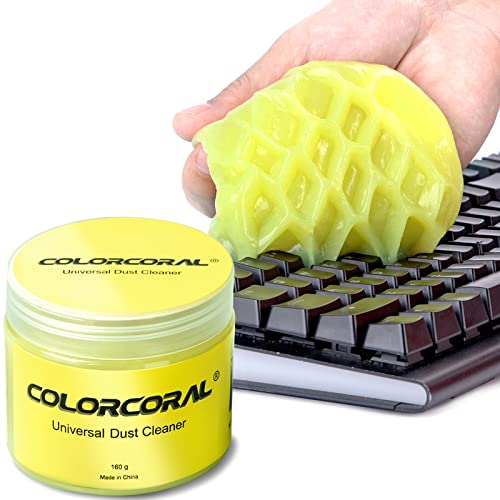
ColorCoral
ColorCoral Cleaning Gel Universal Dust Cleaner for…
- Universal fit: ColorCoral cleaning gel, simple and convenient cleaning kits for PC/laptop keyboard and other rugged surface, such…
- Safe cleaning gel: The keyboard cleaner gel is made from natural gel, no sticky to hands, smells sweet with lemon fragrance, no st…
- Easy dust cleaning: Make sure your hands are dry and clean, knead the cleaning gel into a ball, press the cleaning gel slowly into…
Maintaining your laptop keyboard isn’t just about keeping it clean. It’s about preserving the tactile feel, ensuring every press registers, and preventing the slow death by crumbs and coffee. I’ve learned this through years of fixing my own gear and helping others. The difference between a keyboard that lasts two years and one that lasts five often comes down to a few simple, consistent habits. Let’s get into what actually works.
Why Keyboard Maintenance Matters More Than You Think
Think of your keyboard as the front door to your digital world. Every command, every word, every login starts there. When it fails, you’re locked out. I’ve seen business laptops from Lenovo and HP rendered nearly useless because a single key failed, and the user hadn’t considered an external USB keyboard as a backup. The goal isn’t just to fix problems, but to prevent them entirely.
Keyboards, whether the scissor-switch mechanism in an ultrabook or the mechanical switches in a gaming laptop, are precision devices. Debris accumulation under the keycaps doesn’t just make things dirty. It physically interferes with the mechanism, causing keys to stick, feel spongy, or fail to actuate. For membrane keyboards, a single spill can bridge the circuits, causing phantom key presses. Proactive care is the cheapest insurance policy you’ll ever buy for your machine.
My Hands-On Cleaning Routine: What Actually Works
Forget the quick wipe-down. A real clean requires a bit more finesse. I’ve tried every method, from the overly cautious to the downright reckless. Here’s the routine I’ve settled on after cleaning dozens of keyboards across Dell, Apple, and Asus models.
The Deep Clean (Monthly or After a Spill)
- Power Down & Disconnect: Always. No exceptions.
- Initial Debris Removal: Turn the laptop upside down and gently tap the sides. You’d be shocked what falls out. For loose particles, I use a soft-bristled brush, like a clean makeup brush.
- The Compressed Air Dance: This is where most people go wrong. Hold the can of compressed air upright and use short, controlled bursts. Never tilt the can, as the propellant can freeze and damage components. Angle the laptop and blast from the sides to dislodge stubborn grit.
- Keycap-Level Cleaning: For grimy keycaps, I dampen a microfiber cloth with a 70% isopropyl alcohol solution. It evaporates quickly and won’t damage electronics. Wipe each keycap gently. For a truly deep clean, you can remove keycaps with a keycap puller, but this is risky on laptop keyboardssome are not designed to be removed.
- The Final Wipe: Go over the entire chassis and keycap surfaces with a dry microfiber cloth.
For this entire process, having the right tools makes a world of difference. I used to jury-rig solutions, but now I keep a dedicated Keyboard Cleaning Kit on my desk. It has the right brushes, a safe pry tool, and lint-free wipes, saving me from searching for makeshift tools every time.
How to Clean Under Laptop Keys Without Compressed Air
No compressed air? No problem. A small, soft-bristled paintbrush or a clean, dry toothbrush works wonders. Gently brush between and around the keys to loosen debris, then tip the laptop to let it fall out. For sticky spots, I wrap a thin cloth around a flat tool (like a plastic spudger) dampened with a tiny bit of isopropyl alcohol and carefully swipe along the edges of the key. Patience is key hereliterally.
Preventive Habits I’ve Learned the Hard Way
Cleaning is reactive. Prevention is proactive. These are the non-negotiable rules I live by now.
- No Eating or Drinking: The classic rule. One soda spill can bypass even the best spill-resistant membrane and destroy the keyboard and motherboard. My coffee now lives on a separate table.
- Wash Your Hands: Oils from your skin accelerate grime buildup on keycaps. Simple but effective.
- Close the Lid: When not in use, close your laptop. It keeps dust and pet hair out.
- Use a Keyboard Cover Wisely: I’m ambivalent on these. A thin silicone cover can protect from spills and dust, but it can also trap heat and change the typing feel. I only recommend them for extremely dusty environments or if you absolutely must eat at your desk.
The Right Tools vs. What You Already Have at Home
You don’t need a pro kit to start. Heres my breakdown of essentials versus household substitutes.
| Ideal Tool | Good Household Substitute | My Verdict |
|---|---|---|
| Compressed Air Can | A small, powerful air blower (like for camera lenses) | The blower is reusable and often more powerful. I prefer it. |
| Keycap Puller | Two small, flat-head screwdrivers wrapped in tape | Extremely risky. Only attempt if you’re comfortable and know your keycaps are removable. The puller is safer. |
| Isopropyl Alcohol (70%) | Rubbing alcohol | Same thing. Just ensure it’s not a scented or colored variant. |
| Microfiber Cloths | Lint-free eyeglass cleaning cloths | Perfect substitute. Avoid paper towelsthey can scratch. |
| Plastic Spudger/Pry Tool | A stiff, plastic gift card or old credit card | The card works well for prying up bezels, but a spudger’s pointed end is better for detailed work. |
When Cleaning Isn’t Enough: Troubleshooting Common Issues
Sometimes, the problem is deeper than dirt. Heres how I diagnose the frustrating issues.
Why Is My Laptop Keyboard Typing Wrong Letters?
This maddening problem usually points to software. First, check for stuck modifier keys (Shift, Ctrl, Fn). Try toggling the Fn lock or Num Lock. If that fails, a driver issue is likely. I go into Device Manager, uninstall the keyboard driver, and restart to let Windows reinstall it. For persistent issues, especially after a Windows update, I’ll download the latest keyboard driver directly from the manufacturer’s site (Dell, HP, Lenovo).
How to Fix Laptop Keyboard Keys That Stick
A physically sticky key is often a debris problem. If compressed air doesn’t free it, the keycap may need to be removed. After carefully prying it up with a tool, I clean the exposed scissor-switch mechanism and the underside of the keycap with isopropyl alcohol. For mechanical keyboards on gaming laptops, a tiny amount of specific keyboard lubricants like dielectric grease on the stabilizer wires can work wonders for smoothness, but this is an advanced procedure.
Keyboard Not Working at All?
First, connect an external USB keyboard. If it works, your laptop’s internal keyboard has likely failed or become disconnected. Before assuming hardware death, boot into the BIOS/UEFI. If the keyboard works there, it’s a Windows driver or OS issue. If it’s dead in the BIOS, the connection to the motherboard may be loose or the keyboard itself is frieda common aftermath of a liquid spill.
My Biggest Keyboard Maintenance Mistakes (So You Don’t Make Them)
I’ve learned more from my failures than my successes. Let my scars be your guide.
- Using Too Much Liquid: I once soaked a cloth to clean a keyboard and dripped water into the mechanism. A light dampening is all you need. Isopropyl alcohol should be applied to the cloth, not directly to the laptop.
- Prying Keys Forcefully: I broke the fragile scissor-switch clip on a premium ultrabook by being impatient. Now, I always check the service manual or look for a teardown video for my specific model before attempting keycap removal.
- Ignoring Software: I spent an hour cleaning a keyboard that was “unresponsive,” only to realize I had accidentally enabled Filter Keys in Windows Accessibility settings. Always check software settings first.
- Neglecting the Spill Response: In a panic over a small coffee spill, I turned the laptop right-side up to wipe it. Wrong. Immediately power down, unplug, turn it upside down in a “V” shape to drain, and leave it for at least 48-72 hours. Asus has a great general guide on laptop care and longevity that covers these emergency steps well.
Your laptop keyboard is a workhorse. It doesn’t ask for much. A little regular attention, some preventive caution, and the right approach to troubleshooting can extend its life for years. It’s the most personal interface you have with your machine. Treat it well, and it will reliably translate every thought, command, and keystroke for the long haul. Start with a simple clean this weekend. You’ll feel the difference immediately.
Related pick: Check today's price on Amazon