
How to Maintain and Fix Laptop Hinges
Contents
I’ve cracked open more laptops than I care to admit. From sleek ultrabooks to hulking gaming rigs, one component consistently fails first: the hinge. It’s not a matter of if, but when. That first subtle wiggle in your screen is a quiet alarm bell, and ignoring it is a costly mistake.
Most people treat their laptop like a glorified book, slamming it shut or yanking it open by the corner. I’ve done it myself in a hurry. But after replacing a dozen displays and wrestling with stripped screws, I’ve learned that hinge maintenance is the single most overlooked aspect of laptop longevity. It’s not just about a loose screen; a failing hinge can pinch the display cable, damage the Wi-Fi antenna often routed through it, or even crack the screen bezel. Let’s get into the mechanics before your laptop does.
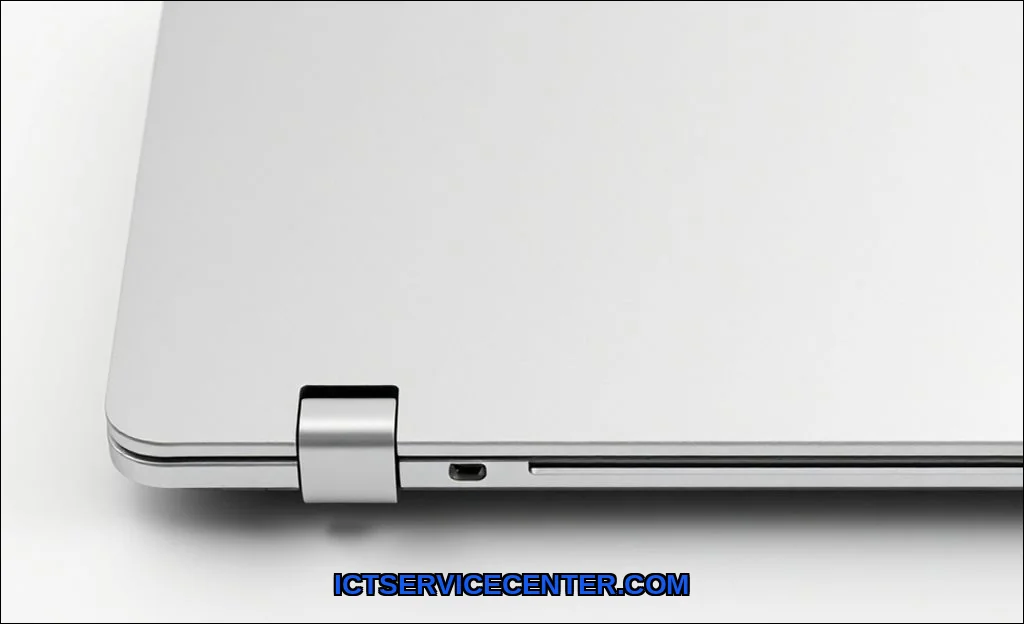
Why Your Laptop Hinge Is a Ticking Time Bomb
Think of the hinge as the wrist of your laptop. It’s under constant, repetitive stress. Every open and close applies torque to tiny screws anchored into often fragile plastic casing. The two main enemies are simple: dust and physical stress. Dust acts as grinding paste, wearing down the pivot points. Stress, from one-handed opening or carrying the laptop by its screen, leads to metal fatigue in the brackets or cracks in the chassis mounts.
I’ve seen a clear pattern. Business laptops from Lenovo or Dell often use more robust, discrete hinge designs. Consumer ultrabooks and many from ASUS or HP favor sleeker, integrated barrel hinges that look clean but can be nightmares to service. The difference in repair cost is staggering. Understanding this design variance is as critical as knowing how to choose a laptop processor for your needs.
The Anatomy of a Creak: Dust and Stress In Action
That annoying laptop hinge squeaking starts here. Dust infiltrates the tiny gap between the hinge barrel and the pivot. With each movement, it grinds. You’re literally sanding down the metal. Physical stress is more dramatic. Lifting a 15-inch laptop by its corner applies immense leverage. The palm rest area flexes, the screws work loose, and the plastic threading strips. Suddenly, your laptop screen won’t stay up. This is often the first major symptom.
Common mistakes accelerate this wear. Never open the lid with one hand from the corner. Always use two hands, centered. Don’t carry the laptop like a tray, gripping only the base. Support the entire device. And for cleaning? Compressed air is your first line of defense, but sometimes you need to go deeper.
My Hands-On Hinge Maintenance Routine
This isn’t theoretical. I perform this routine on my personal and test machines every six months, or immediately if I hear a new sound. You’ll need a precision screwdriver set, 99% isopropyl alcohol, cotton swabs, and the right lubricant.
Warning: Opening your laptop may void warranty stickers. Proceed with caution and know your limits. For many, a professional repair is safer, especially with complex ribbon cables running through the hinge.
- Power Down & Disconnect: Fully shut down, unplug, and remove the battery if possible.
- External Clean: Use compressed air around the hinge gap while slowly opening and closing the lid. Blow out debris.
- Access the Hinge (If Comfortable): This usually requires removing the bottom panel and sometimes the keyboard or bezel. Document screw locations. They often have specific torque requirementsovertightening cracks plastic.
- Deep Clean & Inspect: With the hinge exposed, use alcohol and swabs to clean old grease and grit from the pivot points. Inspect the mounting points in the plastic casing for hairline cracks.
- Lubricate: This is critical. Never use WD-40. It attracts more dust. I use a tiny amount of dielectric grease or synthetic PTFE lubricant on the pivot. A toothpick works for application. Less is more.
- Re-tighten: Gently snug the hinge screws. If they spin freely, the threading is strippeda bigger repair is needed.
- Reassemble & Test: Reassemble in reverse order. Test the hinge feel. It should be smooth, with consistent resistance.
If you’re attempting a repair that involves the display, having a spare on hand is wise. For instance, during a recent hinge repair on an older model, I discovered a cracked LCD from the stress. Having a 10pcs Laptop LCD kit meant I could complete the entire repair in one session instead of waiting for parts.
That First Creak or Crack: Your Action Plan
You’re working, and you hear ita sharp crack or a persistent creak. Stop. This is your intervention window. Why does my laptop hinge make a cracking sound? Usually, it’s the plastic mounting post failing. Immediate action can prevent a full break.
- Stop using it immediately. Every movement worsens the damage.
- Gently open/close to isolate the sound. Is it one side or both?
- If it’s just stiffness or squeaking, try the external cleaning step above.
- If there’s visible play or a crack, it’s time to research laptop hinge repair cost versus replacement.
When Cleaning Isn’t Enough: The Repair Reality
Sometimes, maintenance fails. Metal fatigue sets in, or the plastic is too far gone. You’re faced with a laptop hinge broken fix scenario. Here’s my honest take from the bench.
For a simple how to tighten a laptop hinge screw job, if you can access the screw, it’s a 10-minute fix. But if the screw post is torn out of the chassis, you’re looking at epoxy, a replacement palm-rest assembly, or a full bottom case swap. This is where laptop hinge replacement gets expensive. Labor alone can range from $75 to $200, plus parts.
| Problem | Likely Cause | DIY Difficulty | Professional Cost Estimate |
|---|---|---|---|
| laptop hinge squeaking | Dirt in pivot, dried grease | Low (External clean/lube) | $50 – $80 (if simple) |
| laptop hinge stiff | Grit, misalignment, failing grease | Medium (Requires disassembly) | $80 – $150 |
| laptop screen loose, wobbles | Loose screws, stripped threads | Medium to High | $100 – $200+ |
| Hinge completely detached, screen bezel cracked | Catastrophic plastic failure, metal fatigue | Very High (Full teardown) | $200 – $400+ (may need new display assembly) |
Is it worth it? For a $300 laptop, often not. For a $1500 machine, absolutely. Consider the value of your data and your laptop’s storage and setup before writing it off.
Brand Design Matters: What I’ve Seen on the Bench
Not all hinges are created equal. After working on hundreds, I compare designs. Older ThinkPads have legendary, user-serviceable hinges. Many modern ultrabooks solder or glue components near the hinge, making any repair a high-stakes operation. Gaming laptops have heavy displays, putting more strain on the system. Brands like ASUS provide excellent general care guides, like their resource on ensuring your laptop’s longevity, but rarely detail hinge-specific disassembly.
The trend toward thinner devices is the hinge’s worst enemy. There’s simply less material to anchor into. Knowing this, your handling habits must adapt.
Building Habits That Protect Your Investment
Prevention is cheaper than any repair. Integrate these habits now.
- Open from the center. Two hands. Every single time.
- Carry like a book. Support the base and lid together.
- Mind the cables. Don’t let headphones or chargers get pinched in the hinge.
- Clean proactively. Include the hinge gap in your monthly dusting routine.
- Listen. Your laptop talks to you. A new sound is a clue.
Hinge maintenance is physical device care. It’s the counterpart to managing your digital space. It demands a bit of mechanical sympathy. Treat those pivot points with respect, and they’ll return the favor for years. When that first wiggle appears, you’ll know exactly what to do. You might even save yourself a very expensive lesson.