
 By
A laptop repair toolkit is worth buying only if it has the five tools every laptop job needs: a precision screwdriver set, a spudger set, fine tweezers, a magnetic mat, and a wired anti-static wrist strap. Most cheap kits miss at least one of them.
In short: The best laptop repair toolkit for most people is a precision screwdriver set with Phillips #0 and #1 plus Torx T5, T6, and T8 bits, a plastic spudger and pry tool set, fine curved tweezers, a magnetic screw mat, and a wired anti-static wrist strap. Buy the five as one kit or as separate tools, and check that the bit set lists the exact sizes your laptop uses.
Key takeaways
- Five tools cover nearly every laptop repair: screwdriver set, spudger set, tweezers, magnetic mat, and wrist strap.
- Phillips #0 and Torx T5, T6, and T8 bits fit most laptop bottom panels, so check the kit lists them.
- Plastic pry tools open clips without scratching the case, and metal tools do not belong near a laptop shell.
- A wired wrist strap clipped to bare metal is the only static protection Dell service manuals accept.
- Power off, unplug, back up, and disconnect the battery before you open any laptop.
Quick picks
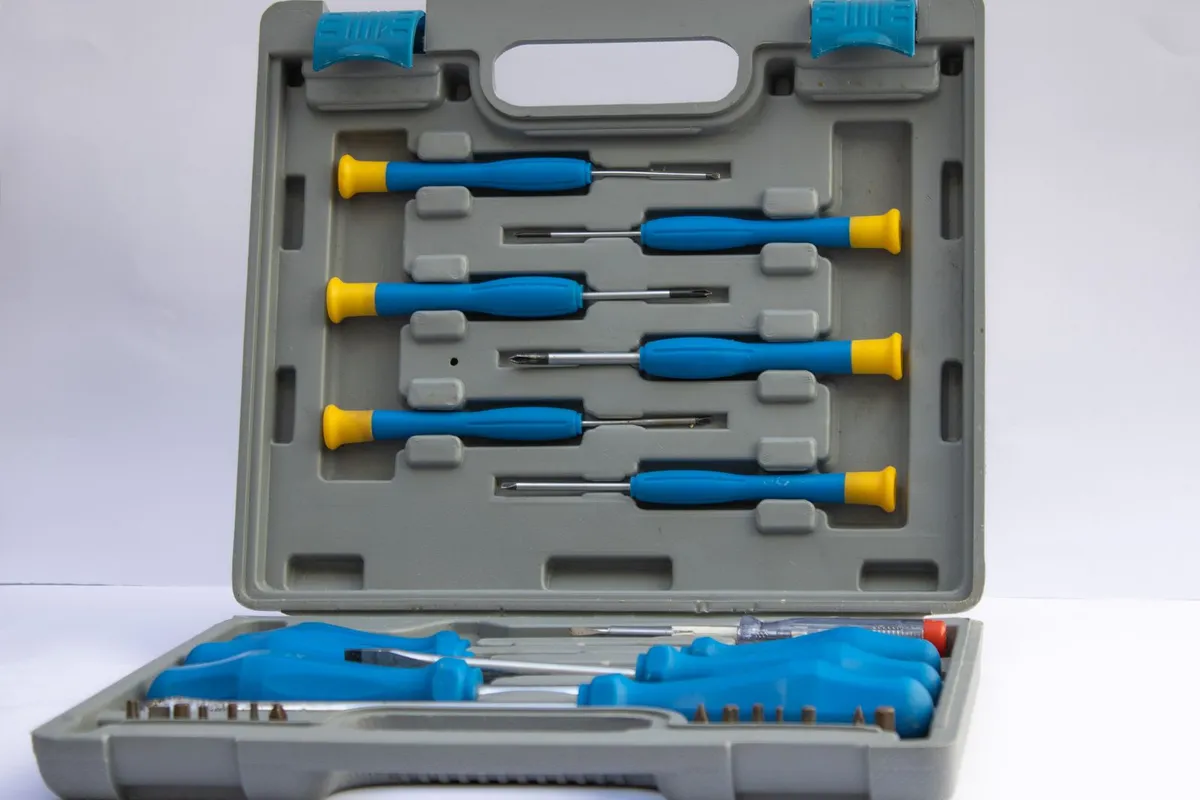
These five picks are the five tools in this guide. Each one solves a job the others cannot do. Pick the full set if you plan more than one repair, or buy only the tool your next job needs. We go through how laptop drives look step by step in its own article.
Quick picks
Our shortlist for this job · tap one to see today's price
A full bit set with Phillips #0 and Torx T5, T6, and T8 covers most laptop bottom panels.

Plastic pry tools and opening picks open clips without scratching the case or snapping clips.

Fine curved tips lift tiny screws and ribbon cables that fingers cannot grip.

A gridded mat holds each screw in its place so nothing ends up in the wrong hole.

A wired strap clipped to bare metal keeps static off the board while you work.
What a laptop repair toolkit needs
Laptop screws are small, the clips are plastic, and the parts inside are easy to harm with static. A toolkit built for laptops differs from a household tool set in three ways: the bits are small, the pry tools are plastic, and the kit plans for static. A big screwdriver from a home toolbox will strip a Phillips #0 screw in one turn.
The diagram below shows the five jobs and what to look for in each tool. Use it as a checklist when you compare kits.
| Tool | Main bits and tools | Pry tools | Static protection | Best for |
|---|---|---|---|---|
| Precision screwdriver set | Phillips #0, #1; Torx T5, T6, T8 | None | None | Opening the bottom panel |
| Spudger and pry tool set | None | Plastic spudgers, opening picks | None | Clips and ribbon cables |
| Fine tweezers set | None | None | ESD-safe tips on some sets | Tiny screws and connectors |
| Magnetic parts mat | None | None | None | Keeping screws in order |
| Anti-static wrist strap | None | None | Wired strap and cord | Protecting the board |
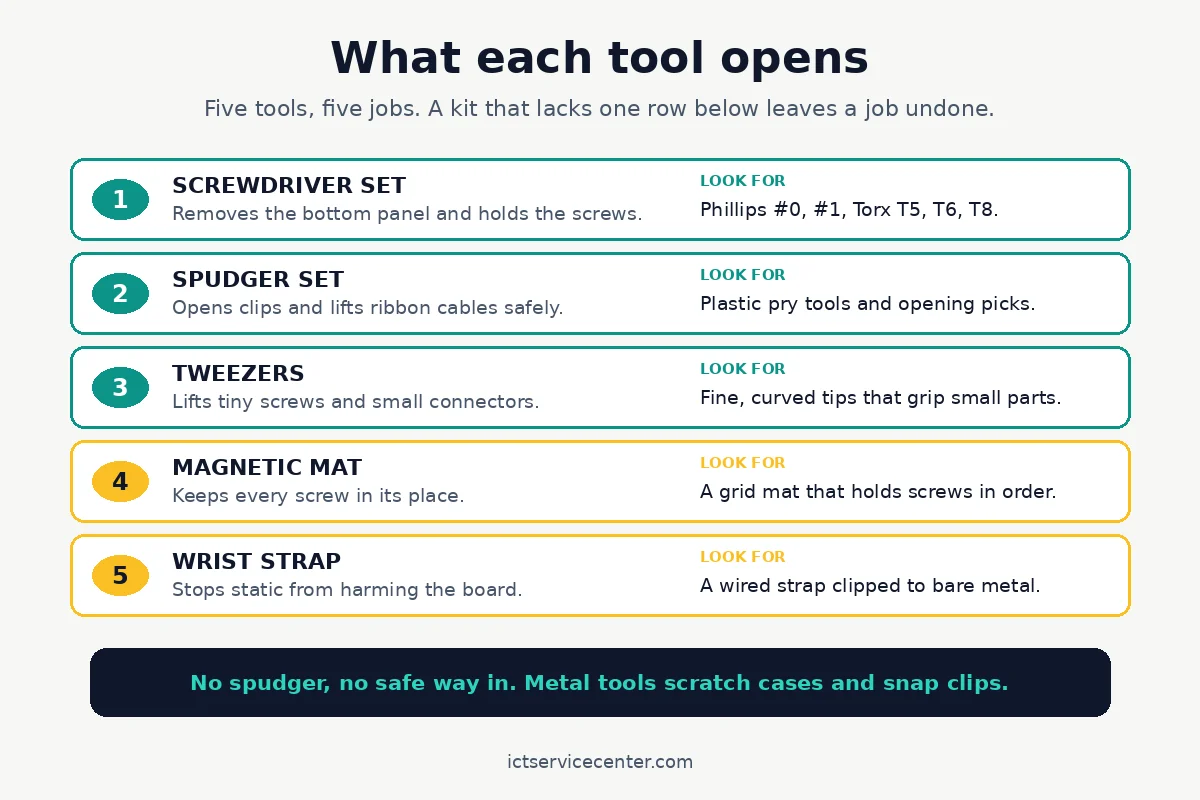
One warning before you shop: some kits add tools you will never use on a laptop, such as large hex keys or a full socket set. Count the bits that fit laptops, not the total piece count on the box.
Check your laptop service manual before you buy. The manual lists the screw types and sizes for your model. Dell, HP, and Lenovo all publish service manuals for most models.
The five kits in detail
Each tool below gets its own section, with the product to search for under it.
1. Precision screwdriver set
The screwdriver set does the most work. It removes the bottom panel screws, the battery screws, and the drive screws, so it is the tool to get right first.
Look for a handle with a spinning top cap, which lets you press down with one finger while you turn with the others. A magnetic tip holds a small screw on the driver while you line it up with the hole.
We cover best mini pc for home office in a guide of its own.
Bit sizes matter more than bit count. Most laptop bottom panels use Phillips #0 or #1, and many use Torx T5 or T6. Some Dell and HP models use Torx T8 for the hinge or the drive caddy. A set that lists Phillips #0, #1, Torx T5, T6, and T8 covers the common cases. If the set lists only “Phillips and Torx” with no sizes, skip it.
Use the right bit and press straight down. A bit that is one size too small will slip and round the screw head, and a rounded head is hard to remove without drilling. If a screw will not turn, stop and check the size again before you force it.
A full bit set with Phillips #0 and Torx T5, T6, and T8 covers most laptop bottom panels.
- - 40Pcs screwdriver set has 30 CRV screwdriver bits which are phillips PH000(+1.2)
- - All our screwdriver bits are made of high quality CR-V chrome vanadium steel. CR-V
2. Spudger and pry tool set
A spudger is a flat plastic tool that slides into the gap between the bottom panel and the case and pops the plastic clips free. Without one, people reach for a knife or a metal screwdriver, and that is how cases get scratched, clips snap, and cables get cut.
A good set has three shapes: a flat spudger for prying, a pointed spudger for lifting connector latches, and thin opening picks that slide along a seam.
The picks are the most useful shape for a laptop, because they stay in the gap and hold the seam open while you work around the edge. The iFixit Surface Laptop 3 screen guide shows the same technique with the pointed and flat ends.
Plastic is the point. Metal pry tools conduct static and scratch the case, and they can cut a ribbon cable with one slip. When you replace a laptop screen, the spudger set is what separates the bezel from the lid without leaving marks.
Plastic pry tools and opening picks open clips without scratching the case or snapping clips.
- Kaisi 20 pcs opening pry tools kit for smart phone,laptop,computer tablet,electronics
- Professional grade stainless steel construction spudger tool kit ensures repeated use
3. Fine tweezers set
Tweezers handle the parts your fingers cannot. They lift tiny screws out of deep holes, pull ribbon cables from their sockets, and hold a small connector while you seat it. Curved tips reach around a battery or a fan shroud where straight tips cannot go.
Blunt tips are safer than sharp ones near a board, because a sharp tip can scratch a trace. If that sounds like your bench, read up on assessing laptop durability under stress next.
Look for a set with at least two shapes: straight fine tips and curved tips. ESD-safe tweezers have a coating that drains static, and they are worth the small extra cost if you handle memory or a board. Never use tweezers to force a connector.
If a ribbon cable will not slide out, the latch is still closed, and the spudger lifts it first. When you replace a laptop keyboard, tweezers hold the small ribbon cable steady while you close its latch.
Fine curved tips lift tiny screws and ribbon cables that fingers cannot grip.
- 2mm thick high-elastic heat-treated stainless steel with ESD anti-static non-magnetic
- Includes pointed needle nose, ultra-fine straight, 45/30-degree angled curved, rounded
4. Magnetic parts mat
A magnetic mat is a flat pad with a printed grid. You place each screw on the grid in the same place it came from, and the magnet holds it there.
That sounds minor until you have twenty screws of four lengths on a desk and no idea which hole each one fits. A screw that is too long can press into the board, and a screw that is too short will not hold the panel.
Use the grid as a map. Put the screws from the top edge on the top row, and work around the laptop in order. The mat costs little and saves the most common repair error: a leftover screw, or a screw in the wrong hole.
A small magnetic tray holds screws but does not map them, so it is a weaker choice for a first repair. If your kit has no mat, a sheet of paper with the screw positions drawn on it works as a stand-in.
A gridded mat holds each screw in its place so nothing ends up in the wrong hole.
- Organize Screws by Step: Keep tiny screws, brackets, shields, covers, fasteners, and
- Help Avoid Screw Mix-Ups: Modern electronics often use similar-looking screws in
5. Anti-static wrist strap
Static is the risk you cannot see. A discharge you cannot feel can harm a memory module or a board, and the damage can show up days later as a fault with no clear cause. Dell service manuals say to use a wired wrist strap and mat when working inside any computer system, and wireless straps do not give enough protection.
A wired strap has a band that sits on your wrist, a cord, and a clip that goes to bare metal, such as the metal frame of the laptop.
Put it on before you touch the board, and keep it on until the case is closed. Touching the chassis once before you start is not enough on its own: Dell notes that it does not ensure enough protection for sensitive parts.
Skip the strap only if you never touch the board, the memory, or a drive connector. The strap is the cheapest tool in this guide and the one that protects the most costly part.
A wired strap clipped to bare metal keeps static off the board while you work.
- Includes two anti-static wrist straps, giving you a spare for a colleague or backup use
- Each strap features a premium PU coiled cord that extends up to 8.2 ft (2.5 m)
How to choose the right kit for your laptop
Start with your next job, not with the biggest kit. A battery swap needs the screwdriver set, the spudger set, and the mat. A memory upgrade needs the screwdriver set, the strap, and tweezers. A screen swap needs all five.
Then check three things on the listing. First, the bit list must name sizes, not just count. Second, the pry tools must be plastic, not metal. Third, the wrist strap must be wired, with a cord and a clip, not a wireless band. A kit that fails any of these three leaves a job undone or puts the board at risk.
Brand matters less than the bit list. Bits marked S2 steel hold their shape longer than plain chrome bits. A kit that lives in a closed case keeps its bits together; a loose set in a drawer loses bits, and a missing Torx T6 on repair day means a trip to the shop.
When you replace a laptop battery, a complete kit with the right bits turns a 30-minute job into a calm one. If you plan a memory upgrade, first check whether the RAM in a laptop can be upgraded, because some models solder the memory in place. For more buying help, see the Buying Guides hub.
Before you open the case
Tools alone do not make a repair safe. Do these steps in order, every time, before the first screw comes out.
- Back up your files. Copy them to an external drive or a cloud account, and confirm the copy opens before you go on.
- Shut the laptop down fully. Use Start, then Power, then Shut down. Sleep is not off, and a laptop in Sleep still powers parts of the board.
- Unplug the charger and remove every cable and card. Then press and hold the power button for 15 to 20 seconds to drain the charge left in the circuits.
- Work on a hard, clean surface with room to lay the mat and the parts out. Keep drinks away from the bench.
- Put the wrist strap on and clip it to bare metal. Keep it on until the case is closed.
- Disconnect the battery before you touch the board. Find the battery connector in the service manual and lift it with the spudger, never by pulling the wires.
Never open a laptop with a swollen battery. A swollen battery can catch fire if it is punctured or bent, so the laptop should go to a shop or the maker. Never open a swollen battery, never charge it, and do not press on it.
Dell safety guidance backs this order: shut down, unplug, remove the battery where the model allows it, discharge the charge left in the board, and ground yourself before you touch parts. It also says to place each part you remove on an anti-static mat and to handle cards and memory by their edges. Read the Dell safety precautions for working inside a computer before your first repair.
Mistakes to avoid
Most laptop repairs go wrong in the same few ways, and all of them trace back to the toolkit or the bench, not to luck. Read the common laptop repair mistakes to avoid for the full list, and keep these six in mind when you shop for a kit.
Buying on piece count. A kit that lists 120 pieces may have 100 bits that fit nothing on a laptop. The fix is to read the bit list and count only the sizes your model uses.
Using a metal pry tool. A knife or a metal spudger scratches the case and can cut a ribbon cable. The fix is a plastic spudger set and opening picks.
Skipping the wrist strap. Static damage is invisible and shows up later as a fault with no clear cause. The fix is a wired strap clipped to bare metal, worn for the whole repair.
Mixing up the screws. Laptop screws differ by length, and a long screw in a short hole can press into the board. The fix is a gridded magnetic mat with each screw mapped to its hole.
Forcing a screw or a connector. A screw that will not turn is the wrong size or cross-threaded, and a connector that will not move still has its latch closed. The fix is to stop, check the size or the latch, and try again gently.
Opening a laptop with no backup. A repair can go wrong even when the tools are right. The fix is a backup made and checked before the first screw comes out. Microsoft has a guide to File History backup and restore that walks through the setup.
Frequently asked questions
What tools do you need to open a laptop?
You need a precision screwdriver set with Phillips #0 and Torx T5, T6, and T8 bits, a plastic spudger set, fine tweezers, a magnetic screw mat, and a wired anti-static wrist strap. The screwdriver opens the panel, the spudger frees the clips, tweezers handle small parts, and the strap guards the board.
Can I use a regular screwdriver on a laptop?
A regular household screwdriver is too large for laptop screws and will strip the heads. Laptop screws need a precision driver with a small bit and a magnetic tip. Use Phillips #0 or #1 for most screws and Torx T5, T6, or T8 where the manual calls for them, and press straight down while you turn.
Do I need an anti-static wrist strap?
Yes, when you touch the board, the memory, or a drive connector. A discharge you cannot feel can harm a part, and the fault may show up days later. Use a wired strap clipped to bare metal and keep it on until the case is closed. Wireless straps do not give enough protection.
What bit sizes fit most laptops?
Phillips #0 and #1 cover most bottom panel screws, and Torx T5, T6, and T8 cover the rest on many Dell, HP, and Lenovo models. Some models also use a Pentalobe or tri-point bit, so check the service manual for your model before you buy. A kit that names its sizes beats one that lists only a total count.
Is a cheap laptop repair toolkit worth buying?
A cheap kit is worth buying only if it lists the right bit sizes, has plastic pry tools, and has a wired wrist strap. A kit that misses Torx T6 or has metal pry tools will cost more in damage than it saves. Spend a little more on a kit with S2 steel bits and a gridded mat.
Bottom line: Buy a kit with a precision screwdriver set in the right sizes, a plastic spudger set, fine tweezers, a magnetic mat, and a wired wrist strap, then back up, shut down, unplug, and disconnect the battery before you open the case.
Sources: Dell, Electrical Safety for Dell Product Repair: ESD Protection and Precautions; iFixit, Microsoft Surface Laptop 3 15-Inch Screen Assembly Replacement; Microsoft Support, Backup and restore with File History. Photos: Carlos Zael, Roseson Studios, Oelnbod, Ksenia Chernaya, Anna Shvets, Mikhail Nilov via Pexels. Diagram: ICT Service Center.