
 By
Windows will not start, and the repair tools you need sit on the drive that will not boot. A recovery drive breaks that loop: a USB stick that starts your laptop into the recovery tools, even when Windows will not load.
In short: A Windows 11 recovery drive is a bootable USB stick made with the built-in Recovery Drive tool. Plug in a USB drive of at least 16 GB, open Recovery Drive from Start search, tick “Back up system files to the recovery drive”, pick the drive, and select Create. It holds the repair tools and the files needed to reinstall Windows, but not your personal files.
Key takeaways
- A recovery drive is a bootable USB stick with the Windows recovery tools, plus the system files needed to reinstall Windows.
- Use a USB drive of at least 16 GB, and 32 GB or more if you back up system files.
- Creating the drive erases everything on the USB stick, so copy files off it first.
- The drive does not back up your documents, photos, or apps, so keep a separate backup of your files.
- Make the drive now, test that it boots, and remake it about once a year.
Before you start: what you need
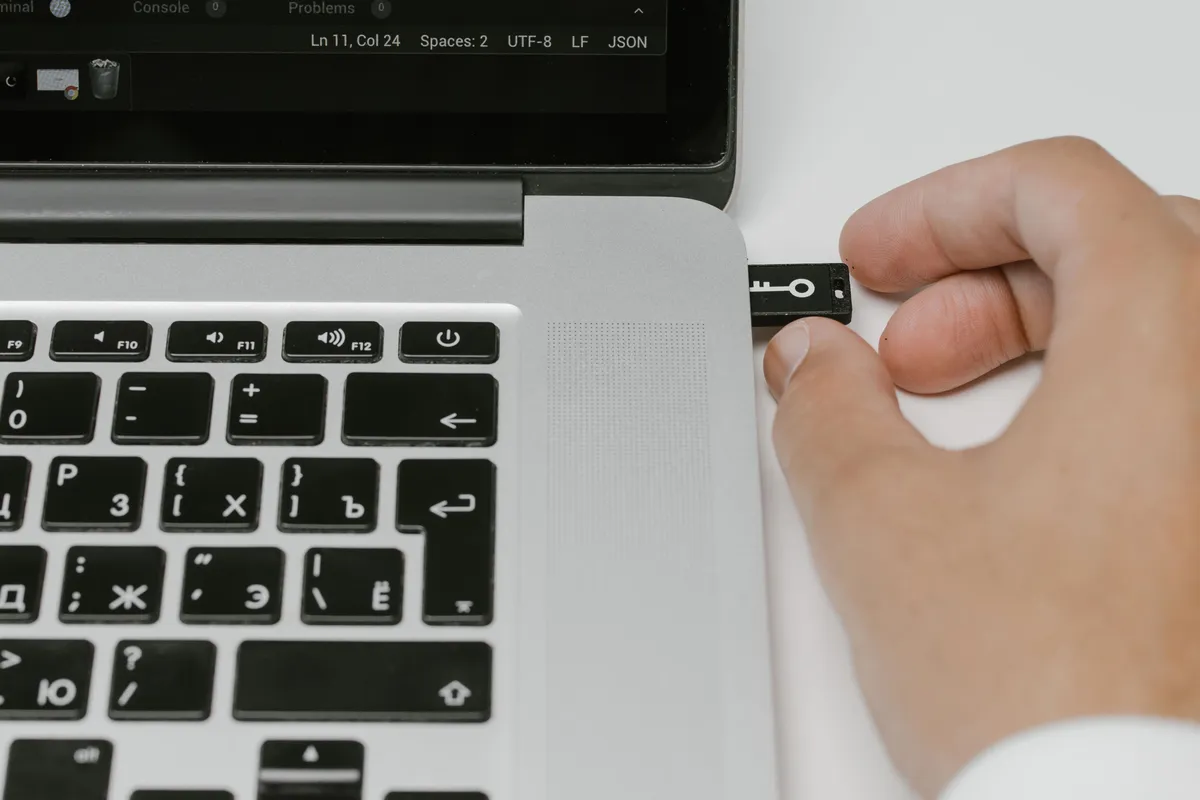
You need a working Windows 11 laptop, a USB flash drive, and a few minutes while Windows copies files. The laptop must work now: you cannot make a recovery drive from a PC that will not start, so do this today, not on the day things break. If that sounds like your bench, read up on sticky key repair next.
The USB drive needs at least 16 GB of space, and 32 GB or more is the better pick when you back up system files, since those files take extra room. Microsoft gives the same sizes in its guidance: 16 GB at the least, and 32 GB or more with the system files box ticked. A USB 3.0 drive copies faster than an old USB 2.0 stick.
A 32 GB drive holds the system files Microsoft recommends backing up, and it leaves room if Windows asks for more space.
See options on AmazonYou also need an account that can approve admin changes.

Creating a recovery drive erases everything on the USB drive, so copy off any photos or work files first. The erase step wipes the USB drive only, not the laptop, but anything on the stick is gone for good.
Know what the drive does and does not save. It holds the built-in Windows files, the updates installed when you made it, and the maker software, so it can restore the PC to its factory state.
It does not hold your personal files, your apps, or your settings. Microsoft says the same: use Windows Backup or File History for your data. Our guide to the best backup methods for a laptop covers the file backup to pair with the drive.
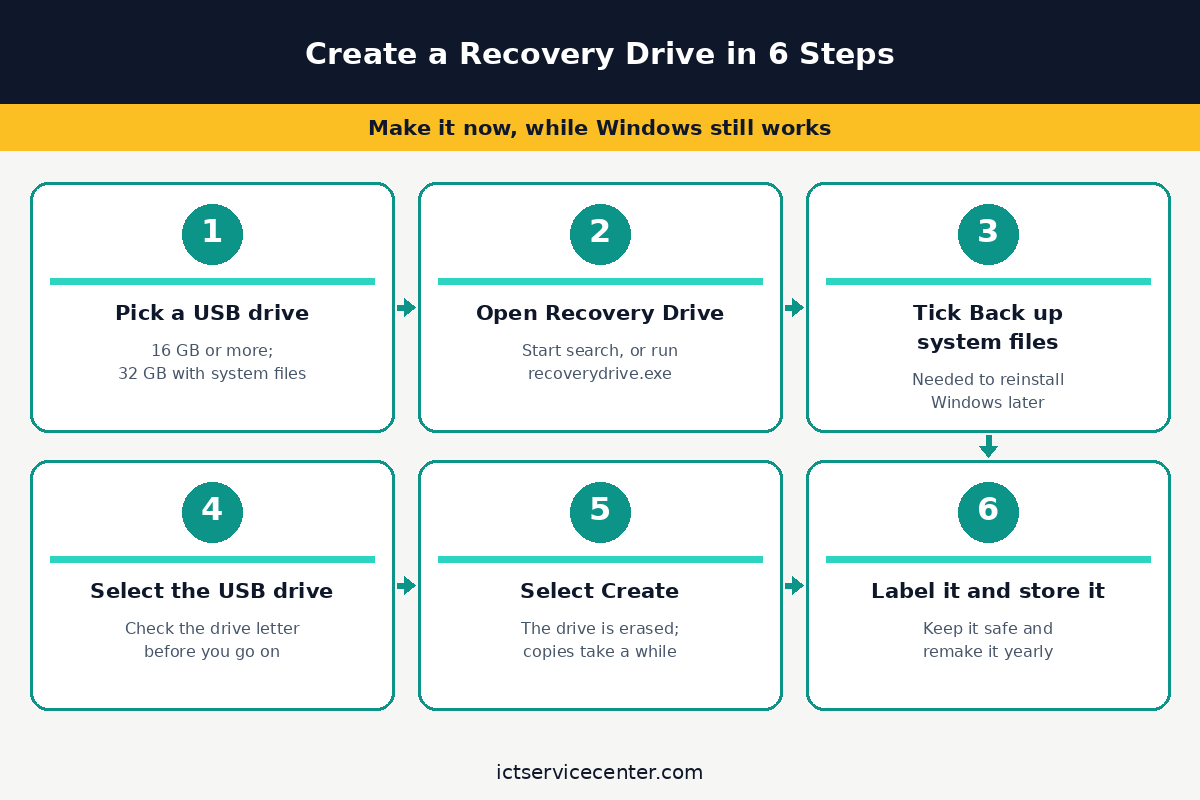
Create the recovery drive in 6 steps
Follow the steps in order, and read each screen before you select Next.
- Plug in the USB drive and copy off anything on it you want to keep. Note its drive letter in File Explorer.
- Open the Recovery Drive tool. Select Start, type Recovery Drive, and select Create a recovery drive. You can also open Control Panel, select Recovery, then Create a recovery drive, or press Win + R, type recoverydrive.exe, and press Enter. Select Yes when Windows asks for permission.
- Make sure Back up system files to the recovery drive is ticked, then select Next. This box is what lets the drive reinstall Windows later, so leave it on.
- Select your USB drive from the list and select Next. Check the drive letter first, since picking the wrong drive erases the wrong stick.
- Read the warning that everything on the drive will be deleted, then select Create. Many files need copying, so this step takes a while. Leave the laptop plugged in and do not pull the drive out.
- When the copy finishes, select Finish, safely remove the drive, and label it with the laptop name and the date. Store it where you will find it again, not in the laptop bag.
The progress bar may sit still while Windows copies system files. If the tool says the drive is too small, use a larger stick and start again from step 2.
Leave the “Back up system files” box ticked even if the copy takes longer. Without it, the drive can only open the repair tools, and it cannot reinstall Windows when the system files are gone. Loaders in this spot often ask about key signs for battery as well.
Test the drive before you need it
A recovery drive you have never booted from is a guess, not a safety net. Test it now, while the laptop still works.

Plug the drive in, restart the laptop, and open the boot menu as soon as the maker logo appears. The key varies by maker, so check the laptop manual or watch the startup screen for the prompt. Pick the USB drive. Windows Recovery Environment opens on a blue screen that says Choose an option.
Once you see that screen, the drive works. Select Continue to start Windows again. If Windows starts as normal instead, restart and try the boot menu key again, or change the boot order in the firmware settings from Settings > System > Recovery > Advanced startup.
Test it again after a new Windows version or a new internal drive. A failed test is useful news: remake the drive now, while you still can.
Use the recovery drive when Windows will not start
When Windows will not start, the recovery drive is your way in. Plug it in, turn the laptop on, and open the boot menu the same way you did in the test. Pick the USB drive and wait for the blue Choose an option screen.
Try the gentler tools first: under Troubleshoot > Advanced options you will find Startup Repair, System Restore, and Command Prompt. Startup Repair fixes boot files that stop Windows from loading, and System Restore rolls the system back to a restore point. Our guide to repairing Windows without reinstalling walks through these tools in order. The other half of this decision is using recovery tools to resolve system errors.
Use Recover from a drive only when the gentler tools fail, since it reinstalls Windows and removes your files and apps.
Select Troubleshoot, then Recover from a drive. Just remove my files is quicker, for a laptop you will keep using. Fully clean the drive takes longer and makes the old files harder to recover, so pick it when the laptop is leaving your hands.
If the laptop is leaving your hands, read our guide to wiping a laptop before selling first.
If the drive is encrypted with BitLocker, have the recovery key ready before you start: some recovery tools ask for it. The key is usually saved to your Microsoft account, so check there first.
After the reinstall, Windows is back to its factory state, as it was when you made the drive. You will need to reinstall your apps and restore your files from your backup. The drive saves the PC, not your data.
Recovery drive vs a system image vs a reset
Windows has three ways back from a broken system. Pick the one that matches your problem.
| Option | What it is | What it saves | Use it when |
|---|---|---|---|
| Recovery drive | A USB stick with recovery tools and system files | Nothing personal; reinstalls Windows | Windows will not start and you made the drive |
| System image | A full copy of the drive at one moment | Everything as it was then, files and apps | You made the image before the problem |
| Reset this PC | A built-in reinstall from Settings or recovery | Your files with Keep my files; apps and settings go | Windows starts but is badly broken |
A system image is made in Control Panel > Backup and Restore (Windows 7) > Create a system image, on an external drive with plenty of room.
It is the only one of the three that brings your files back, but only as they were on the day the image was made. It is also tied to the PC it came from, so it cannot move your files to a new laptop.
For that job, follow our guide to transferring files from an old laptop to a new laptop.
A reset needs no extra media. Open Settings > System > Recovery, select Reset PC, and pick Keep my files or Remove everything. It is the right call when Windows still starts and the repair tools have not fixed the fault. The recovery drive is the right call when Windows will not start at all. We cover restoring deleted laptop files in a guide of its own.
Each laptop needs its own recovery drive, made on that laptop. When you buy a new laptop, make its recovery drive on the first day. Our guide to setting up a new laptop lists the other first-day jobs.
When to remake the drive
Microsoft recommends recreating the drive about once a year, so it picks up the latest Windows updates. An old drive still boots, but it restores an old version of Windows, and you will spend hours installing updates to catch up.
Remake it sooner after a Windows version upgrade, a new internal drive, or a major repair. Write the date on the label each time, so you can tell at a glance whether the drive is current.
Store it somewhere safe, such as a drawer at home with the laptop manual. Keep it away from heat and damp, and out of the laptop bag, since a lost bag takes the rescue drive with it. Tell one other person in the house where it is.
Mistakes to avoid
1. Using a USB drive that still holds files you need. The tool erases the whole stick before it copies anything, so copy the files off first and check the drive in File Explorer.
2. Unticking “Back up system files” to save space. A drive made without the system files can only open the repair tools, not reinstall Windows. Buy a 32 GB stick instead. The other half of this decision is activating hardware-level security.
3. Making the drive on a different PC and expecting it to fix yours. The drive is built for the PC it was made on, so it may not match another laptop’s hardware.
4. Skipping the boot test until the day Windows fails. A drive that has never been tested may not boot, and finding that out during a real failure costs hours. Test it the day you make it.
5. Treating the recovery drive as a backup of your files. It holds Windows, not your documents, photos, or apps, and a reinstall from the drive wipes your files. Keep a separate file backup and test that too.
Frequently asked questions
How big a USB drive do I need for a Windows 11 recovery drive?
At least 16 GB, and 32 GB or more is better when you tick “Back up system files to the recovery drive”. Microsoft gives the same sizes: 16 GB at the least, and 32 to 64 GB with the box ticked. If the tool says the drive is too small, use a larger stick.
Does a recovery drive back up my files?
No. A recovery drive holds the Windows recovery tools, the system files, and the maker software needed to restore the PC, but not your documents, photos, or apps. Back up your personal files separately with Windows Backup or File History, on a different drive from the recovery stick.
Can I use a recovery drive on a different laptop?
It may boot, but it is not made for that laptop. The drive is built for the PC it was created on, with that PC’s updates and maker software, so it may not match the other laptop’s hardware. Make a separate drive on each laptop you own, and label each one.
What happens if I do not tick “Back up system files”?
The drive still holds the repair tools, so you can open Startup Repair, System Restore, and Command Prompt from it. What you lose is the reinstall: without the system files, the drive cannot restore Windows to its factory state. Leave the box ticked, and buy a larger drive if yours is too small.
How often should I make a new recovery drive?
About once a year, which is the schedule Microsoft recommends, so the drive picks up the latest Windows updates. Remake it sooner after a Windows version upgrade, a new internal drive, or a major repair. Write the date on the label, and test the new drive before you put the old one away.
Bottom line: Make the recovery drive today, while Windows still works: a 32 GB USB stick, the Recovery Drive tool, the system files box ticked, and a quick boot test. Label it, store it somewhere safe, and remake it about once a year. More care guides: see the Care and Maintenance hub.
Sources: Microsoft Support, Recovery Drive; Microsoft Learn, How do I make a Windows 11 recovery drive USB; Microsoft Support, Backup, restore, and recovery in Windows. Photos: cottonbro studio, Kaboompics, Mikhail Nilov and Pixabay via Pexels. Diagram: ictservicecenter.com.