
Adding new memory to your laptop should be a straightforward performance boost. But sometimes, that new module arrives, you install it with care, and… nothing. A black screen. A series of beeps. Or your system keeps crashing. You are likely dealing with a RAM compatibility issue. Its a frustrating moment, but it is also a very common problem with clear solutions.
You don’t need to panic. Most RAM compatibility problems are caused by specific, identifiable factorsfrom physical slot limitations to BIOS settings.
This guide will walk you through the exact steps to diagnose the issue, check your laptop’s memory support, and get your system running stable. We’ll cover everything from identifying incompatible memory symptoms to understanding the differences between DDR4 and DDR5 modules.
For this project, many professionals recommend using the Crucial 32GB DDR4 which provides a reliable, tested upgrade path for compatible systems.
Understanding RAM Compatibility in Laptops
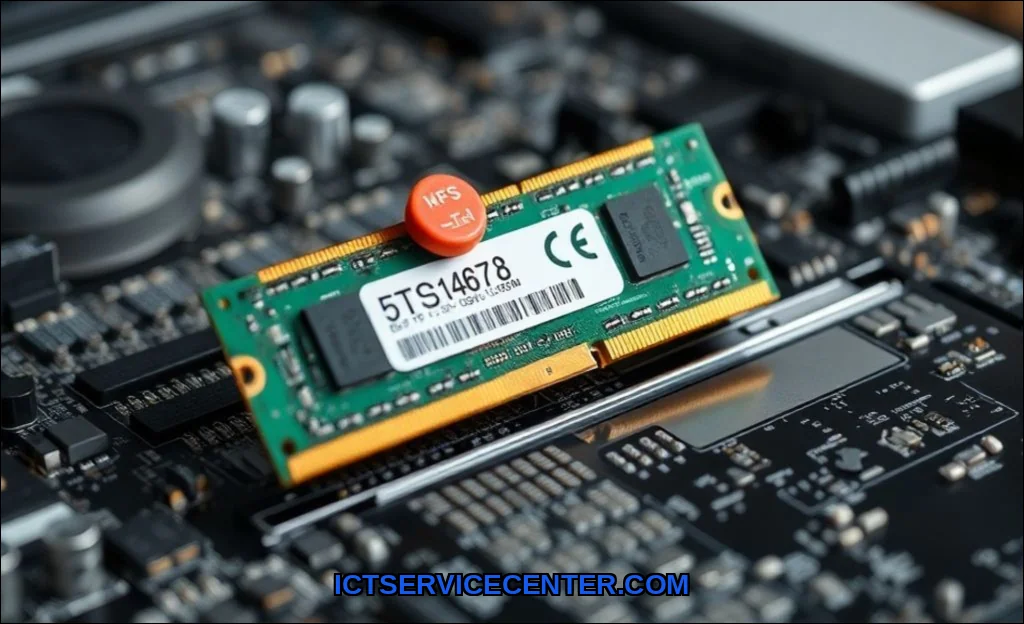
Laptop memory is not the same as desktop memory. The physical form factor is called SO-DIMM (Small Outline Dual In-line Memory Module). It is roughly half the size of a standard desktop DIMM. This is the first, and most obvious, compatibility check. If you try to install a desktop stick into a laptop slot, it simply will not fit.
Beyond the physical size, the biggest compatibility factor is generation. Your laptop’s motherboard and processor are designed to work with a specific generation of memory. The two primary generations you will encounter today are DDR4 and DDR5.
They are not interchangeable. A DDR4 module has a different notch position and different electrical signaling than a DDR5 module. Forcing either into the wrong slot can damage the memory or the motherboard. The other half of this decision is laptop not working? step.
Other critical factors include:
- Speed (MHz): Your laptop will typically downclock faster memory to match the maximum supported speed of the system. A RAM speed mismatch will not prevent booting, but it can cause system instability if the memory controller struggles to negotiate a stable timing.
- Voltage: Standard SO-DIMM modules operate at specific voltages (e.g., 1.2V for DDR4). Using a module with a different voltage requirement can cause instability or failure to post.
- Capacity per Slot: Laptops have a maximum supported capacity per slot (e.g., 16GB or 32GB). Installing a 32GB module into a slot that only supports 16GB will likely result in a boot failure.
Common Symptoms of RAM Incompatibility
Before you start troubleshooting, you need to identify the specific symptoms. Knowing what you are dealing with will save you time. The most common signs of a laptop RAM not working situation include:
- System fails to POST (Power-On Self-Test): The laptop turns on, fans spin, but the screen remains black. You might hear a series of beeps from the speaker. This is a classic sign of a physical or electrical incompatibility.
- Random crashes and blue screens (BSOD): Your laptop works for a few minutes, then suddenly freezes or throws a blue screen error. This often points to a RAM speed mismatch or a faulty module.
- Boot loops: The laptop starts, runs for a few seconds, then shuts down and restarts repeatedly. This can indicate that the memory is not being recognized or is causing a critical error.
- Incorrect memory capacity: You installed a 16GB module, but the system only shows 8GB. This suggests a slot is not functioning correctly, or the module is not fully seated.
- System instability under load: The laptop works fine for browsing but crashes when you open a game or a video editing application. This is a common system instability symptom related to memory timing issues.
Step-by-Step Guide to Diagnose the Issue
Let’s move from symptoms to solutions. Follow this order to methodically rule out common problems. We go through diagnosing laptop hardware step by step in its own article.
Step 1: Physical Inspection and Reseating
This is the simplest fix and often the most effective. A module that is not fully inserted into the slot will cause a boot failure.
- Power down completely. Unplug the AC adapter and remove the battery if it is removable.
- Discharge static electricity. Touch a metal surface (like a doorknob or the laptop’s metal chassis) before handling components. This is critical for electrostatic discharge protection.
- Locate the memory compartment. On most laptops, this is a small panel on the bottom held by a few screws.
- Remove and reinstall the module. Gently press the clips outward. The module will pop up at a 45-degree angle. Remove it, then slide it back into the slot at the same angle. Press down firmly until the clips click into place.
- Test with one module. If you have two sticks, try booting with just one in the primary slot (usually the slot closest to the CPU). If it works, try the other stick in the same slot. This isolates a faulty module from a faulty slot.
Step 2: Check Your Laptop’s RAM Specifications
You need to know exactly what your laptop supports. This is the most important step in solving a RAM compatibility issue. You cannot guess. You must verify.
How to check which RAM is compatible with my laptop:
- Use the manufacturer’s support page. Go to the HP, Dell, or Lenovo support site. Enter your laptop’s exact model number (e.g., “HP Pavilion 15-eg2040nr”). Look for the “Product Specifications” or “Technical Specs” section. It will list the memory type (e.g., DDR4-3200), maximum capacity, and number of slots.
- Use a system information tool. If your laptop is currently working, open the Command Prompt and type
wmic memorychip get speed, memorytype, formfactor. This will show you the installed memory’s speed and form factor (13 means SO-DIMM). - Use a third-party scanner. Tools like Crucial System Scanner or CPU-Z will read your system’s hardware and tell you exactly what memory is supported. This is often the easiest method for laptop memory support verification.
Step 3: Verify the Module’s Specifications
Once you know what your laptop needs, check the label on your new RAM stick. Look for the part number. A typical label might read “DDR4-3200 1.2V CL22”.
Match this to your laptop’s requirements. A RAM speed mismatch (e.g., your laptop supports 3200MHz and you installed 2666MHz) will usually work, but the system will run at the slower speed.
A generation mismatch (e.g., DDR5 in a DDR4 slot) will not work at all.
Troubleshooting RAM Compatibility Problems

If the physical installation and specification checks are correct, but the system is still unstable, you need to dig deeper into the software and hardware settings.
BIOS Configuration and Updates

The BIOS (Basic Input/Output System) controls how the motherboard communicates with the memory. An outdated BIOS can cause RAM compatibility issues with newer memory modules. There is more on our notes on ram issues fast in a separate guide.
- Update your BIOS. Check your laptop manufacturer’s site for a BIOS update. This can add support for newer memory modules or fix memory timing issues. This is a safe procedure if done correctly, but follow the manufacturer’s instructions exactly.
- Reset BIOS to default. In the BIOS menu, look for an option to “Load Optimized Defaults” or “Reset to Factory Settings”. This clears any incorrect memory timings that might have been set.
- Disable XMP/DOCP. Some gaming laptops allow memory overclocking profiles (XMP for Intel, DOCP for AMD). If you are using standard memory, disable these profiles to run at the JEDEC standard timings.
Memory Slot Issues
A faulty memory slot is less common but does happen. If you have two slots and one module works in slot A but not slot B, the slot itself may be damaged. This can occur from physical stress or debris in the slot. If you suspect a slot issue, you have a few options:
- Use only the working slot with a single, larger capacity module.
- If the laptop is under warranty, contact the manufacturer for a repair.
- If out of warranty, a professional technician can inspect the slot for bent pins or damage.
Operating System and Driver Conflicts
While rare, a corrupted operating system can sometimes report incorrect memory or cause instability. This is more of a software issue than a hardware compatibility one. If you have ruled out all hardware causes, consider running the Windows Memory Diagnostic tool (type “Windows Memory Diagnostic” in the Start menu). This will test for errors. If errors are found, the memory is likely faulty, not just incompatible.
If you are experiencing broader system issues that might be related to other hardware conflicts, learning how to fix driver issues on laptop can help isolate software problems from hardware failures.
When to Seek Professional Laptop Repair
Not every RAM compatibility issue is solvable at home. Some problems require specialized tools and experience. You should consider professional help in the following scenarios:
- Physical damage: You have bent pins in the memory slot or visible damage to the motherboard.
- Warranty concerns: Opening your laptop may void the warranty. If your device is still under coverage, it is safer to let the manufacturer handle the upgrade or repair. Check this external resource for signs you need professional laptop repair.
- Persistent instability after all steps: If you have verified compatibility, reseated the modules, updated the BIOS, and the system still crashes, there may be a deeper issue with the memory controller or motherboard.
- Soldered memory: Many modern ultrabooks have memory soldered directly to the motherboard. This is not user-upgradable. If you need more RAM, you must replace the entire motherboard.
Before you buy new memory, it’s also wise to evaluate your actual needs. A common mistake is buying more RAM than your system can effectively use.
To help you make an informed decision, read our guide on how much RAM you need in a laptop to avoid overspending on capacity your workload doesn’t require.
It helps to understand can you upgrade laptop ram? heres what to know before going further.
Practical Conclusion
Fixing a RAM compatibility issue in a laptop is rarely a mystery. It is a process of elimination. Start with the physical installation, then verify the specifications against your laptop’s documented support.
If the system still shows system instability, move to BIOS updates and slot testing. Most problems are solved by simply reseating the module or swapping to a known-compatible stick.
Remember to always practice electrostatic discharge protection and check for warranty void considerations before opening your device. If you are stuck, a professional repair service has the tools and diagnostic equipment to resolve the issue quickly. Your laptop’s performance is worth the careful effort.