
 By
Your computer failed to boot or the drive vanished from the file explorer just now. This page helps you confirm if the SSD is truly dead or if it is a connection or settings issue.
In short: An SSD usually stops working because of a loose M.2 screw, a disabled SATA link in BIOS, a failed firmware update, or total NAND wear-out. Check these five points in order before assuming the hardware failed. If the drive is recognized as unallocated space, the controller may be alive but the data partition is lost.
Quick picks
Our shortlist for this job · tap one to see today's price
Gives you a fast, reliable PCIe 4.0 drive to restore normal system speed if your old M.2 SSD is dead.

Clones your old drive to a new one so you keep your files while fixing the failure.
Is Your SSD Actually Dead? Confirm the Drive Status First
Before you spend money on a new drive, confirm that the SSD is not just hidden or disconnected.
A silent boot screen or a ‘No boot device’ error can mean the SSD is fine but not detected by the system. Confirming the actual status saves you from replacing a working part. This first step separates hardware failure from software confusion.
There is more on fix a dead usb port on laptop in a separate guide.
Start by checking the physical connection. For M.2 SSDs, the small plastic tab can pop out of the slot. For 2.5-inch SATA drives, the data cable can come loose inside the case.
A drive that was working yesterday can stop working today if it vibrated loose. You do not need special tools to check this. Look for the drive and ensure it is fully seated.
If the drive is seated, check if the system sees it at all. Boot into your BIOS or UEFI setup screen. If the SSD appears in the storage list, the hardware is likely alive.
If it is completely missing from the list, the drive may be dead or the motherboard slot is faulty. This one check tells you where to focus your next step.
- Check M.2 slots: Reseat the drive and ensure the screw is tight.
- Check SATA cables: Power off and re-click the data and power cables.
- Verify BIOS storage: Boot to BIOS and look for the drive name.
- Power off the computer completely and unplug it.
- Open the case or laptop chassis and locate the SSD.
- Reseat the drive and tighten the M.2 screw if applicable.
- Close the case, power on, and enter the BIOS setup screen.
- Look under ‘Storage’ or ‘Drives’ to see if the SSD is listed.
Pro tip: If your M.2 SSD is missing from the BIOS list but a USB stick works, the M.2 slot or drive may be dead. Try a different M.2 slot if your motherboard has one.
Check the BIOS Boot Order and Secure Boot Settings
If the SSD is visible in the BIOS but the computer will not boot into Windows, the issue is often a settings problem. The system may be trying to boot from a different drive or from a USB stick. The other half of this decision is checking for physical connection faults.
This is a common cause for ‘SSD stopped working’ reports where the drive is actually fine. The system just forgot which drive to use. Changing two settings usually fixes it.
Go to the Boot section in your BIOS. Look for ‘Boot Order’ or ‘Boot Priority’. Ensure your SSD is listed first.
Sometimes a USB flash drive left plugged in can take priority. Remove all USB drives and save the changes. The computer should now attempt to boot from the SSD.
You will see the Windows logo or your bootloader screen instead of an error.
Also check ‘Secure Boot’ and ‘Fast Boot’. Some SSDs with certain controllers act strangely if Fast Boot is enabled on older systems. Secure Boot must be enabled for UEFI booting.
If you recently updated your SSD firmware, these settings might have reset. Toggle Secure Boot off, save, and restart to test if the drive is recognized. If it boots, your data is safe. We cover fixing failing SSD issues in a guide of its own.
- Remove USB devices: Unplug all USB drives and sticks from the PC.
- Set Boot Order: Move the SSD to position #1 in the boot list.
- Check Secure Boot: Ensure it is set to ‘Enabled’ for UEFI systems.
Pro tip: If you change BIOS settings and the screen freezes, press and hold the power button for 10 seconds to force a reboot.
Run Windows Recovery Tools to Repair the File System
If the SSD is visible in BIOS but the computer gets a black screen, the bootloader or file system may be corrupted. This happens after a bad shutdown or a power cut.
The drive is still alive, but the software that tells the computer where to look for the operating system is damaged. You can repair this without replacing the SSD. Use Windows recovery tools to check the drive.
This is the fastest fix for a ‘dead’ drive that actually has data.
Boot into Windows Recovery Environment. Select ‘Troubleshoot’ and then ‘Command Prompt’. Type the command chkdsk C: /f to check the file system for errors.
Press Enter. The tool will scan the drive and repair minor file system issues. If the command finishes successfully, type reboot to restart the computer. The other half of this decision is spotting when performance drops sharply.
Your files should be accessible again. This takes five to ten minutes depending on the drive size.
If chkdsk fails, try the startup repair tool first. Select ‘Automatic Repair’ from the main recovery menu. Windows will attempt to fix the boot manager.
If that does not work, the file system may be too damaged to repair easily. Back up your data using a bootable USB drive before attempting any reinstallation. You can boot from a USB stick to access your files. Save them to an external drive first.
- Boot to Recovery: Turn on the PC and interrupt the boot to enter recovery.
- Run chkdsk: Type chkdsk C: /f in the command prompt and press Enter.
- Back up data: Use a USB stick to save important files before reinstalling.
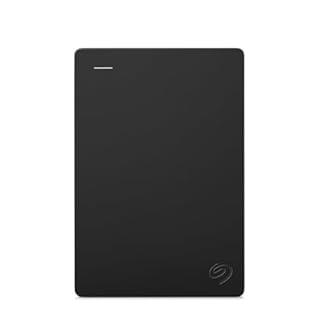
A USB external drive lets you save your files before you attempt to repair or replace the internal SSD.
- Easily store and access 4TB of content on the go with the Seagate Portable Drive, a USB
- Designed to work with Windows or Mac computers, this external hard drive makes backup a
Watch for Warning Signs Your SSD Is About to Die
Most SSDs do not fail without warning, but there are specific signs that the drive is nearing the end of its lifespan. Ignoring these signs leads to total data loss. The drive will not stop working instantly; it degrades over time.
Watch for these symptoms so you can back up your data before it is too late. This knowledge helps you decide if the drive can be saved or needs replacement.
First, check for unusual noises. M.2 NVMe SSDs are completely silent. A 2.5-inch SATA SSD with moving parts does not exist; they are solid state.
If you hear a click or grinding from a 2.5-inch drive, it is not an SSD. It is a hard drive. If your ‘SSD’ makes noise, you may have a different type of failure.
Second, check for slow performance. If your computer takes longer to open apps, the SSD may be full or the NAND cells are wearing out. Check the free space on your C: drive. Keep it at least 10 percent free.
Use software like CrystalDiskInfo to check the S.M.A.R.T. health status. This free tool reads the drive’s internal health counters. Look for the ‘Wear Leveling Count’ and ‘Total NAND Writes’.
If the health status shows ‘Caution’ or ‘Bad’, the drive is failing. Back up your data immediately. Do not wait for the next error message.
A failing SSD can write data one day and become read-only or dead the next. This is the most important step to prevent total data loss.
- Check S.M.A.R.T. status: Use CrystalDiskInfo to see if the drive says ‘Caution’ or ‘Bad’.
- Monitor free space: Keep at least 10 percent of the SSD capacity empty for best performance.
- Back up data: Use an external drive to save your files while the SSD still works.
- Download and open CrystalDiskInfo on a working computer.
- Look at the ‘Health Status’ field for each connected SSD.
- If it says ‘Good’, you have time. If it says ‘Caution’, back up now.
- If it says ‘Bad’, replace the drive immediately.
How to Clone Your Data Before You Replace the SSD
If your SSD is failing but still works, do not wait for it to die completely. Clone the drive to a new SSD so you can boot into Windows and your files without reinstalling everything. This saves you hours of setup work.
Cloning copies every sector of the old drive to the new one. The new drive becomes a bootable copy. You can swap the old drive for the new one and start using the computer immediately. This is the safest way to replace a failing SSD.
You will need a new SSD of the same size or larger. If the new drive is larger, the cloning software can resize the partition to use the extra space.
Connect the new SSD to your computer using a USB-to-SATA adapter for 2.5-inch drives or an M.2 adapter for NVMe drives. Use cloning software like NTI Echo or Macrium Reflect. Start the clone and wait for the progress bar to finish.
This takes between 10 and 60 minutes depending on the drive size and the amount of data. Do not close the software or unplug the drive while cloning.
Once the clone is complete, power off the computer. Remove the old SSD and install the new one in its place. If the new drive is larger, you may need to extend the partition in Windows Disk Management to use the full capacity.
Boot into Windows. If the computer starts normally, the clone was successful. If it does not boot, check the boot mode in BIOS.
Ensure it is set to UEFI if the new drive was cloned in UEFI mode. This step ensures the new drive is recognized as the boot drive.
- Connect the new drive: Use a USB adapter for SATA or an M.2 bracket for NVMe.
- Run the clone: Select the old drive as source and the new drive as destination.
- Swap the drives: Install the new SSD in the computer after the clone finishes.
- Connect the new SSD to your computer using a USB adapter.
- Open the cloning software and select ‘Clone Drive’.
- Choose the old SSD as the source and the new SSD as the destination.
- Click ‘Start’ and wait for the clone to finish.
- Power off, install the new SSD, and boot into Windows.
This kit gives you the software and the cable you need to copy your old drive to a new one before it dies.
- Clone between legacy 512-byte-sector drives and newer 4K-sector drives in either
- NTI’s proprietary Dynamic Resize technology automatically adjusts partitions when
When to Stop and Get a New SSD Instead
There are clear signs that your SSD is dead and no amount of settings or software will fix it. Knowing when to stop saving time is important.
If the drive is not visible in BIOS and you have already reseated it and tried a different slot, the controller has likely failed. If the S.M.A.R.T. status says ‘Bad’ or the drive is completely unresponsive, the NAND flash is dead.
In these cases, replacing the SSD is the only fix. Do not spend hours trying to repair a dead drive.
Buying a new SSD is fast and straightforward. Choose a drive that matches your old one’s interface. If you had a 2.5-inch SATA drive, buy another 2.5-inch SATA SSD.
If you had an M.2 NVMe drive, buy another M.2 NVMe drive. Match the capacity or go larger. You do not need to buy a premium drive unless you need high speeds for gaming or video editing.
A mid-price drive from a reputable brand is reliable for everyday use. Ensure the new drive is listed as compatible with your motherboard.
Once you have the new drive, install it in the computer. If you cloned the old drive, the new one is ready to boot. If you did not clone, you will need to install Windows or macOS fresh.
Use the recovery drive or installation media to set up the new drive. This takes about 20 minutes to an hour. After setup, your computer will work as normal.
The new SSD will be faster and more reliable than the dead one. This is the final step to get your computer working again.
- Choose the right interface: Match SATA or M.2 to your old drive’s type.
- Match or exceed capacity: Buy the same size or larger to keep all your files.
- Install the OS: Use a USB installation stick if you did not clone the old drive.
- Remove the dead SSD from the computer.
- Insert the new SSD into the slot and secure it with a screw.
- Boot into BIOS and verify the new drive is visible.
- Install Windows or macOS from a USB stick if needed.
The bottom line
If your SSD is not visible in BIOS, the drive is likely dead and you need a new one. If it is visible but will not boot, fix the BIOS boot order or run chkdsk to repair the file system. The one product most readers need is a replacement SSD if the drive is confirmed dead.
- PCIe 4.0 Gen4: The high-performance Predator GM7 delivers uncompromising speeds up to
- HMB+SLC Cache: Predator GM7 supports HMB (Host Memory Buffer) and is equipped with SLC
Frequently asked questions
Why does my SSD keep disappearing from the file explorer?
This usually means the SATA data cable is loose or the drive’s power cable is not seated. Unplug the power, open the case, and re-plug both the data and power cables firmly. If it disappears again after a few hours, the drive’s controller may be failing and you should replace it.
Can I fix a dead SSD by opening it up?
No, you cannot fix a dead SSD by opening it. The NAND chips and controller are sealed inside and cannot be repaired by a user. If the S.M.A.R.T. status is bad or the drive is not visible in BIOS, it needs to be replaced. Professional data recovery is possible but costs money.
How do I know if my SSD is full and acting slow?
If your SSD has less than 10 percent free space, it slows down significantly. Open your file explorer, right-click the C: drive, and select Properties to see the free space. If it is below 10 percent, delete large files or move them to an external drive to restore performance.
Will a new SSD run faster than my old one?
Yes, if your old drive is a 2.5-inch SATA SSD, a new M.2 NVMe SSD will run much faster. NVMe drives use the PCIe bus instead of the slower SATA bus. This makes boot times and file transfers several times faster. Check your motherboard for an available M.2 slot before buying.