Laptop Screen Dim? Fix a Dim Display at Full Brightness

I was in the middle of a video edit when it happened. My laptop screen just faded. The brightness slider was maxed out, but the image looked like it was under a permanent shadow. It wasn’t just annoying; it was a workflow killer. I spent the next few hours diving down a rabbit hole of fixes, from the obvious to the obscure. This is the hands-on, experiential guide I wish I’d had, detailing every step I took to diagnose and understand a dim laptop screen.
Before we start, let’s be real: sometimes the fix is a replacement. If you’re staring at a screen with obvious physical damage, deep shadows, or flickering lines, the internal components are likely compromised. In my years of tinkering, I’ve found that a quality replacement panel is often the most reliable solution. For a trusted option, many in the repair community turn to the SCREENARAMA New Screen. It’s a go-to for its compatibility and clarity, especially when you’ve exhausted the software fixes we’ll cover first.
My Laptop Screen Went Dim: Here’s What I Tried First
My immediate reaction was panic, followed by systematic troubleshooting. I started with the simplest, most reversible steps. This is where most people should begin, especially if the brightness slider is unresponsive or the display dim issue appeared after a Windows update or a new app installation.
First, I rebooted. It’s clich, but it works more often than you’d think. A fresh start clears out driver glitches and memory leaks that can affect display output. Next, I checked the physical keys. On many laptops, like certain HP or Lenovo models, the Fn key combined with a brightness function key can get stuck or become unresponsive. I mashed them a few times, cycling from minimum to maximum brightness.
I also grabbed a flashlight. Shining it at an angle onto the dark screen is a classic diagnostic trick. If I could faintly see my desktop icons and windows with the flashlight, that told me the LCD panel itself was receiving an image. The problem was almost certainly the backlightthe light source behind the screenand not the graphics processor. This is a key distinction between a laptop screen dark due to a backlight problem versus a complete graphics failure.
The Usual Suspects: Software & Settings Checks
When a simple reboot doesn’t cut it, you have to dig into the software. I treat this like a detective process, eliminating one potential cause at a time.
Battling Adaptive Brightness and Power Plans
Windows and macOS are a little too “helpful” sometimes. The biggest culprit I find is adaptive brightness. This feature uses an ambient light sensor (if your laptop has one) to automatically adjust screen brightness. It’s notorious for making screens too dim in well-lit rooms. I went straight to Settings > System > Display and toggled this setting off. On a Dell XPS, this made an immediate, noticeable difference.
Next, I scrutinized the power settings. The “Power Saver” plan aggressively throttles screen brightness to save battery. Even on “Balanced,” there are advanced settings that cap brightness. I opened the old Control Panel, navigated to Power Options, and clicked “Change plan settings” for my active plan. Then, “Change advanced power settings.” Under “Display,” I ensured both “On battery” and “Plugged in” settings for display brightness were at 100%. This is a common fix for the specific issue of why is my laptop screen dim on full brightness windows 11.
The Driver Dilemma
Corrupted or outdated display drivers are a prime suspect. I don’t just rely on Windows Update here. I went to the source. For my laptop with integrated Intel graphics, I opened the Intel Graphics Command Centera specific tool competitors often overlook. I checked the display settings within that app, as they can override Windows settings. For dedicated NVIDIA or AMD GPUs, the NVIDIA Control Panel or AMD Radeon Software holds similar power.
My next step was a clean driver reinstall. I used Device Manager to uninstall the display adapter (checking the box to delete the driver software), then rebooted to let Windows install a basic driver. After that, I manually downloaded the latest driver from my laptop manufacturer’s support page (HP, Dell, Lenovo) and installed it. A clean install often resolves conflicts causing a dim screen fix.
Digging Deeper: Hardware & Power Diagnostics
When all software avenues are exhausted, the problem is likely physical. This is where you move from quick fixes to serious diagnostics.
I first considered the AC adapter. A failing power brick can’t deliver enough juice, forcing the system to conserve power by dimming the screen. I swapped in a known-good charger of the correct wattage. I also checked the battery health. An old, degraded battery can cause weird power delivery issues across the whole system, not just runtime. Windows has a built-in battery report generator you can run from the command line.
Then, I thought about heat. Excessive heat can cause components to throttle. I used monitoring software to check my CPU and GPU temperatures. If they were spiking, it could trigger protective measures that affect performance and, indirectly, display behavior. Ensuring proper laptop cooling and heat management is part of holistic maintenance that impacts everything, including your screen’s performance.
When to Suspect a Failing Backlight or Inverter
This is the hardware heart of the issue. Modern laptops use LED backlights, which are arrays of tiny LEDs behind the LCD panel. Older laptops used CCFL tubes, which required a high-voltage inverter board to power them.
- LED Backlight Failure: This is the most common hardware cause today. LEDs can fail individually (causing dark spots or patches) or as a whole strip. The telltale sign is that flashlight test: you see an image, but no light from the screen itself. The fix is replacing the entire screen assembly or just the LED strip, which is a delicate job.
- Inverter Board Failure (Older Laptops): If you have an older laptop with a CCFL lamp, a failing inverter is the classic culprit for a screen too dark. The inverter is a small circuit board that powers the backlight tube. They are known to fail. Symptoms include a very dim screen, a screen that flickers on for a second then dies, or a high-pitched whine from the screen area.
For a visual guide on handling screen components safely, our tutorial on safely cleaning your laptop screen covers the careful approach needed for any screen-related work.
The DIY Fixes I’d Attempt (And The One I Wouldn’t)
Based on my diagnosis, here’s what I feel comfortable doing myself, and where I draw the line.
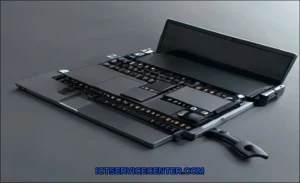
I Would Attempt: Reseating cables. Inside the laptop, a thin, flat cable called the LCD ribbon cable connects the screen to the motherboard. Over time, it can work loose. After carefully removing the bezel (the plastic frame around the screen), I’d disconnect and firmly reconnect this cable. The same goes for the backlight cable, if it’s separate. This has solved a laptop screen dark but can see with flashlight scenario for me more than once.
I Would NOT Attempt: Replacing surface-mounted components on the motherboard or inverter board. If the problem is a blown capacitor or fuse on the main logic board, that requires micro-soldering skills and specialized tools. The risk of causing catastrophic damage is far too high. At that point, the cost-benefit analysis shifts toward professional repair or replacement.
Knowing When It’s Time to Call a Pro
Tech pride is real, but so is the reality of complex electronics. You should seek professional help if:
- The flashlight test confirms a LED backlight failure and you’re not confident in disassembling the entire display assembly.
- You see signs of liquid damage or burnt components.
- The problem is intermittent and seems tied to flexing the screen hinge (indicating a broken wire within the hinge cable).
- You’ve done all the software steps and the internal cable reseat, but the screen remains stubbornly dim.
For brand-specific issues, like a persistent HP laptop screen dim at maximum brightness fix that resists all standard troubleshooting, the manufacturer’s resources are invaluable. HP’s own support team has a detailed guide on general laptop troubleshooting steps that can provide model-specific context.
A Quick Comparison: Consumer vs. Pro/Gaming Laptops
It’s worth noting that the complexity of repair varies. A slim consumer ultrabook often has its display fused into a single, expensive assembly. A business laptop like a ThinkPad or a gaming laptop might be more modular, making a backlight or panel swap slightly more accessible for a seasoned DIYer. Always, always check the service manual for your specific model before taking anything apart.
Fixing a dim laptop screen is a journey from simple settings to complex hardware. Start with the free and easy software checksdisable adaptive brightness, update your drivers, scrutinize every power setting. If the image is visible with a flashlight, you’re likely facing a backlight issue, either a failed LED strip or, on older machines, a dead inverter board. Know your limits. Reseating a cable is one thing; soldering on a motherboard is another. My experience taught me that patience and a systematic approach are your best tools. When in doubt, a quality replacement panel or a trusted technician is the surest path back to a bright, clear display.