Laptop Fan Not Working? Here’s How to Fix It Fast
Its a sound no laptop owner wants to hear. That grinding, whirring, or total silence from your cooling fan. Your laptop feels warm to the touch, and you know something is wrong. A non-functioning fan is not just an annoyance; its a direct threat to your systems health. Without proper cooling, your laptops processor and graphics chip can overheat, leading to sudden shutdowns, performance drops, and permanent damage.
But dont panic. In most cases, this is a problem you can solve yourself. Whether its a simple clog of dust or a failing bearing, well walk you through every step. This guide covers everything from diagnosis to repair, helping you get your laptop’s cooling system back in working order. If you find the process too complex, well also discuss when its time to call in a professional.
Why Is My Laptop Fan Not Working? (Common Causes)
Before you start disassembling anything, it helps to understand what youre dealing with. A laptop fan not working can stem from several distinct issues. Some are trivial to fix; others require a part replacement.
Dust and Debris Buildup
This is the number one culprit. Over months of use, your laptop acts like a tiny vacuum cleaner. It pulls in dust, pet hair, and lint through the intake vents. This debris clogs the fan blades and blocks the exhaust fins. When this happens, the fan struggles to spin or stops entirely. You might also notice your laptop fan noise getting louder before it goes silent, as the motor strains against the blockage.
Fan Bearing Failure
Every fan has a bearing that allows the blades to spin smoothly. These bearings wear out over time. When they fail, youll often hear a grinding or rattling sound. Eventually, the friction becomes too great, and the fan stops spinning. This is a mechanical failure. Cleaning wont fix it. You will need to lubricate the bearing (a temporary fix) or replace the fan.
Software or Driver Issues
Sometimes, the fan is physically fine, but the brain controlling it is confused. A corrupt driver, a misconfigured BIOS setting, or a rogue software program can prevent the fan from turning on. This is less common than hardware failure, but its worth checking before you open your laptop. A simple driver update can often resolve this.
How to Diagnose a Faulty Laptop Fan
Accurate diagnosis saves you time and effort. You dont want to replace a perfectly good fan if the real problem is a software glitch. Here is a systematic approach.
Listening for Unusual Noises
Power on your laptop and listen closely. Is the fan completely silent, or do you hear a grinding, clicking, or buzzing? A grinding noise points to a fan bearing issue. Complete silence might mean a blockage or a power delivery problem. If you hear a repetitive clicking, something might be physically hitting the fan blades, like a stray cable or a large piece of debris.
Checking Fan Speed in BIOS or Software
You can bypass the operating system entirely. Restart your laptop and press the key to enter the BIOS (usually F2, F10, Del, or Esc). Look for a hardware monitor section. It will show you the fans RPM (revolutions per minute). If the RPM reads 0 or N/A, the fan is not receiving power or is dead. You can also use software like SpeedFan or NoteBook FanControl to check speeds from within Windows.
Visual Inspection of the Fan Vent
Shine a flashlight into the exhaust vent (usually on the back or side of the laptop). Can you see solid dust blocking the fins? Is the fan blade itself visible and covered in fuzz? If you can see a thick layer of dust, that is likely your primary issue. This is a strong indicator that laptop dust removal is needed.
Step-by-Step Guide: How to Repair a Laptop Fan
If youve diagnosed a hardware issue, here is the practical repair process. Work slowly and carefully. This process requires patience.
Step 1: Power Down and Unplug Your Laptop
This is non-negotiable. Shut down your laptop completely. Disconnect the AC adapter. If your laptop has a removable battery, take it out. Press and hold the power button for 10 seconds to drain any residual charge in the capacitors. This prevents accidental shorts and protects you from electric shock.
Step 2: Access the Fan (Back Panel Removal)
Flip your laptop over. Youll need a small Phillips-head screwdriver. Remove all the screws securing the bottom panel. Keep them organizeduse a magnetic mat or a piece of tape to hold them. Some screws might be hidden under rubber feet or stickers. Once the screws are out, use a plastic spudger or a guitar pick to gently pry the panel loose. Work your way around the edge until it pops free.
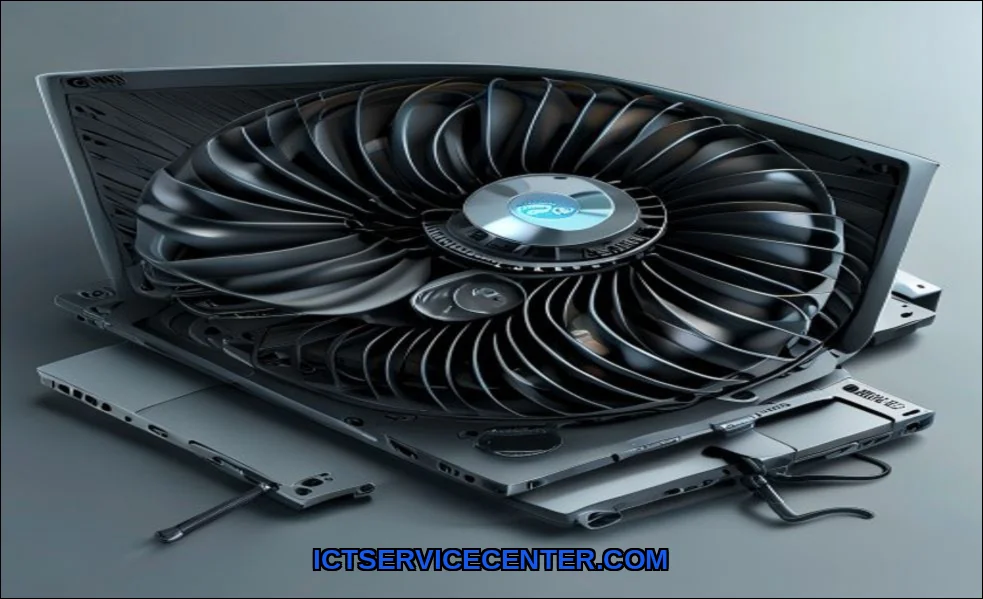
Step 3: Clean the Fan and Vents (Compressed Air)
Now you can see the fan. Use a can of compressed air to blow out the dust. Do not let the fan spin freely while you spray. Hold the fan blade still with a toothpick or a cotton swab. If you let it spin, it can generate a voltage and damage the motherboard. Spray in short bursts from different angles. Focus on the exhaust fins and the fan blades themselves. For stubborn dust, use a soft brush.
Step 4: Lubricate the Fan Bearing (If Applicable)
If the fan is clean but still makes noise, you might try lubrication. Remove the fan from the laptop (usually 2-3 small screws). Peel back the sticker on the center of the fan hub. Underneath, youll see a small rubber plug. Pry it out. Place one tiny drop of lightweight oil (sewing machine oil or 3-in-1 oil) into the hole. Do not use WD-40. Spin the fan manually to distribute the oil. Replace the plug and sticker. This is a temporary fix but can extend the fan’s life by months.
Step 5: Reassemble and Test
Put the bottom panel back on and secure all screws. Reconnect the battery and power. Boot up your laptop. Your fan should now be spinning quietly and moving air. If you want a professional-grade solution for a failed fan, consider using a Replacement CPU Cooling fan module designed for your specific laptop model. It ensures proper fit and thermal performance.
When to Replace the Laptop Fan Instead of Repairing
Cleaning and lubrication dont always work. Sometimes the fan is simply dead. Here is how to know when to give up on repair and buy a new part.
Signs You Need a New Fan
- The fan is physically broken (blades are cracked or missing).
- Lubrication did not stop the grinding noise.
- The fan does not spin at all, even when you manually push it.
- You see a laptop fan error message on boot.
- Your laptop emits a series of beep codes indicating a fan failure.
Finding a Compatible Replacement Fan
Do not guess. Fan connectors and sizes vary widely. Look up your laptops exact model number (e.g., Dell Latitude 7490). Search for laptop fan replacement guide for your specific model. Use parts websites or Amazon to find a fan that matches the original part number. If you are unsure, a repair shop can help you identify the correct part.
Software Solutions for Fan Control
Before you open your laptop, always try the software route. It is the easiest fix.
Updating BIOS and Drivers
Manufacturers like HP, Dell, and Lenovo release updates that improve fan control logic. Visit your laptop makers support site. Download and install the latest BIOS update and the chipset driver. This can fix bugs where the fan fails to turn on at the correct temperature.
Using Fan Control Software (e.g., SpeedFan, NoteBook FanControl)
These tools give you manual control over fan speed. They can override the default BIOS behavior. This is useful if your fan works but is too quiet or too loud. Be careful: setting the fan too low can cause laptop thermal throttling, slowing down your CPU to protect itself. Monitor your temperatures carefully.
Preventing Future Fan Issues
An ounce of prevention is worth a pound of cure. Keep your cooling system healthy with good habits.
Regular Cleaning Schedule
Set a reminder to clean your vents every three to six months. Use compressed air on the exhaust port without opening the laptop. For a deeper clean, perform the full disassembly process once a year. This prevents laptop overheating causes from developing in the first place.
Using a Laptop Cooling Pad
A cooling pad lifts your laptop off the desk, improving airflow underneath. Many pads have their own fans that help exhaust heat. This reduces the workload on your internal fan. It is a cheap and effective way to extend your fans lifespan.
When to Seek Professional Laptop Fan Repair
Not every repair is a DIY project. Know your limits.
Risks of DIY Repair (Warranty, Damage)
Opening your laptop voids most warranties. You can also break delicate ribbon cables, strip screw threads, or damage the motherboard with static electricity. If your laptop is still under warranty, contact the manufacturer first. If you are uncomfortable with small screws and tiny connectors, stop.
Finding a Reliable Repair Service
Search for a local repair shop with good reviews. Ask if they have experience with your brand. A professional can diagnose the problem quickly and has access to genuine parts. They can also reapply laptop thermal paste to the CPU and GPU, which is often needed when you remove a heat sink. This is a critical step many DIYers skip.
If your fan issue is part of a larger hardware problem, you might find our guide on fixing a non-responsive laptop keyboard helpful for related troubleshooting. For a broader understanding of cooling system failures, our detailed article on laptop fan not working properly covers additional diagnostic methods.
For a general overview of when professional help is needed, HP’s official guide offers a useful checklist on 10 ways to know you need laptop repair.
Final Thoughts
A silent laptop fan is a serious symptom. It signals that your system is at risk. But you now have a clear path forward. Start with simple diagnostics and software checks. Move to cleaning and lubrication. If those fail, consider a replacement fan or professional help. Taking action today prevents a much more expensive repair tomorrow. Your laptop will thank you with years of reliable, cool performance.