Few things are as frustrating as plugging in your laptop only to see the battery icon stubbornly refuse to show the charging symbol. You wiggle the cable, adjust the angle, and maybe even prop it up with a book. The charge flickers on and off. If this sounds familiar, you are likely dealing with a loose charging port.
This is a common issue, but it is rarely a mystery. Whether you own an HP, Dell, or Lenovo, the root cause is usually physical wear or accidental damage. The good news is that you have options. Before you panic or price out a new machine, lets walk through what is happening, how to diagnose it, and what you can actually do to fix it.
Why Your Laptop Charging Port Becomes Loose
Laptop charging ports fail for a few specific reasons. Understanding the cause helps you prevent it from happening again.
Physical Stress and Wear
The most common culprit is simple physics. Every time you plug or unplug the charging cable, you apply force to the port. Over months or years, the internal solder joints connecting the port to the motherboard can crack. This is especially true if you frequently yank the cord out by the cable instead of the plug itself.
Accidental Drops and Impacts
If you have ever asked yourself, why is my laptop charging port loose after drop, the answer is mechanical shock. A drop can physically snap the port off its solder pads or bend the metal housing inside the laptop chassis.
Poor Quality or Damaged Cables
Sometimes the problem is not the port at all. A frayed or bent charging cable can create a loose connection inside the plug itself. This mimics a bad port. Always check the cable first.
Debris and Corrosion
Dust, lint, and pocket debris can pack into the port. This prevents the plug from seating fully. The charging cable wiggles in port even though the jack is physically intact.
Quick Self-Diagnosis: Is It the Port or the Cable?
Before you attempt any repair, you need to isolate the problem. This is the most critical step. A misdiagnosis leads to wasted time and money.
- Test with another charger. Borrow a friends adapter or buy a universal charger. If the new charger works fine, your old charging cable is the issue.
- Check the plug tip. Look at the end of your AC adapter connection. Is the center pin bent or broken? A bent charging pin fix is sometimes possible with pliers, but a broken pin means a new adapter.
- Wiggle test. Plug the charger in. Gently move the plug left, right, up, and down. If the charging light flickers only when you move the plug, the loose power jack laptop issue is likely internal.
- Inspect the port visually. Use a flashlight. Look inside the port. Do you see a broken plastic shroud or a missing metal pin? If the port looks physically deformed, you have a hardware problem.
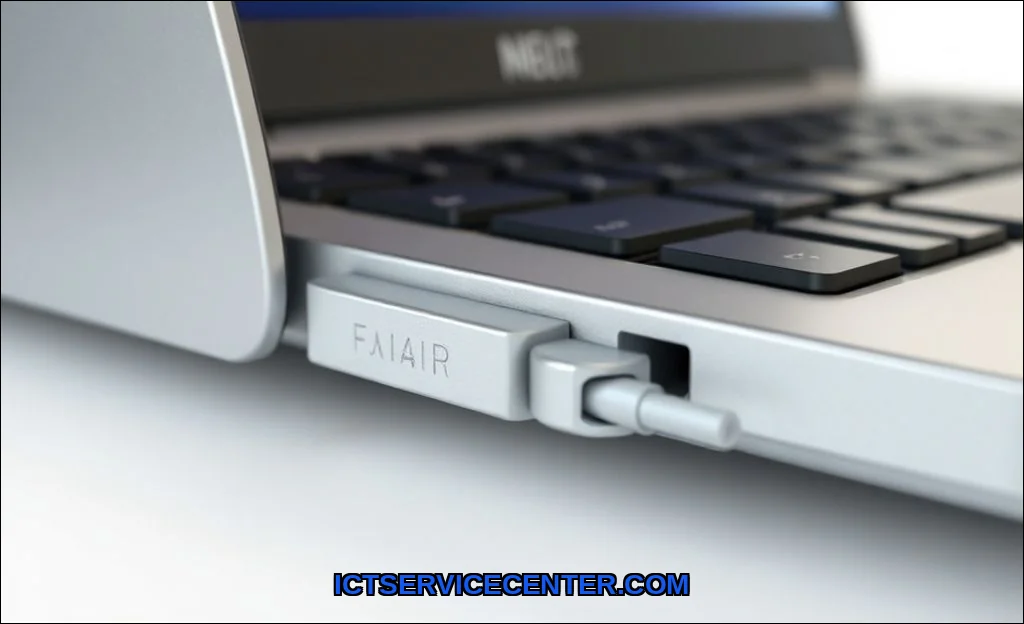
For users with modern laptops, USB-C charging port issues are increasingly common. USB-C ports are smaller and more fragile than barrel jacks. If the plug feels loose but the port looks clean, the internal connector may have detached from the motherboard.
Safe Temporary Fixes You Can Try at Home
If you need your laptop to work right now, you can try a few temporary measures. These are not permanent solutions, but they can buy you time.
Adjust the Cable Position
Sometimes the laptop charging port not working is a matter of angle. Prop the laptop up on a book or a stand so the cable hangs straight down. Gravity can help maintain contact. This is not elegant, but it works for some users.
Clean the Port
Turn off your laptop. Use a wooden toothpick or a plastic spudger to gently scrape debris from inside the port. Charging port cleaning methods are simple but effective. Do not use a metal tool. You can short out the pins. Compressed air can also blow out loose dust.
The Toothpick Trick (Use with Caution)
For barrel-style jacks, a tiny piece of a toothpick can be placed inside the port to push the plug tighter against the contacts. This is a hack, not a repair. It can damage the port further. Only use this if you are desperate and understand the risk.
If you have a newer laptop with a USB-C port, consider using a USB C Magnetic adapter. This product attaches magnetically to your port, reducing physical wear. You can find a reliable version USB C Magnetic adapter online. It acts as a sacrificial connector, saving your internal port from daily plugging stress.
When to Attempt a DIY Repair vs. Call a Professional
This is where you need to be honest with your skill level. A loose charging port repair requires soldering. There is no way around it for most internal ports.
DIY Repair: The Reality Check
Soldering laptop charging port repairs is a delicate operation. You need:
- A soldering iron with a fine tip
- Flux and solder wick
- A multimeter for testing continuity
- Patience and a steady hand
If you have never soldered before, this is not the place to start. You can cause motherboard damage that costs more to fix than the original port repair. For experienced hobbyists, replacing a DC jack is a straightforward task. You can find replacement parts on eBay or Amazon for $5 to $15.
Professional Repair: The Safe Choice
Most users should seek professional laptop repair. A technician will:
- Disassemble the laptop completely.
- Remove the old DC jack using a desoldering tool.
- Clean the solder pads on the motherboard.
- Solder in a new, genuine replacement port.
- Test the repair under load.
The charging port replacement cost varies. You can expect to pay between $50 and $150 for labor plus parts. This is significantly cheaper than a new motherboard or a new laptop.
When to Skip Repair Altogether
If your laptop is more than five years old and the repair quote exceeds $150, consider replacing the machine. The cost of a professional laptop repair may not be worth it for an older device with a slow processor. If you are already dealing with a slow system, check out our guide on how to fix a slow laptop without upgrading to see if performance improvements are possible before committing to hardware repair.
The Professional Repair Process (What to Expect)
If you decide to hand your laptop to a technician, here is what happens. Understanding the process helps you ask the right questions.
Step 1: Diagnosis
The technician will confirm the issue is the DC jack and not the motherboard charging circuit. They use a multimeter to check for continuity from the port to the power management IC.
Step 2: Disassembly
The laptop is opened. The motherboard is removed. This is not a simple process for modern ultrabooks. Some require removing the entire keyboard assembly to access the port.
Step 3: Desoldering
The old port is removed. Heat is applied to the solder joints. The technician uses a solder sucker or wick to clean the holes.
Step 4: Installation
The new port is inserted. Fresh solder is applied. The technician checks for cold joints or bridges. They also verify the port is aligned correctly with the laptop chassis.
Step 5: Testing
The laptop is reassembled. It is powered on and tested with the original charger. The technician checks that the battery charges normally under load.
If your laptop also fails to charge at all, even when the plug feels tight, the issue might be deeper. Read our guide on laptop battery not charging troubleshooting for additional steps before you pay for a port replacement.
How to Prevent Charging Port Problems in the Future
Prevention is far easier than repair. Here are practical habits that extend the life of your port.
Handle the Cable Correctly
Always grip the plug, not the cable, when disconnecting. Pulling the wire strains the internal connections. This is the number one cause of laptop power connector loose issues.
Use a Magnetic Adapter
As mentioned earlier, a USB C Magnetic adapter or a magnetic tip for barrel jacks reduces physical wear. The magnetic connection breaks away cleanly if the cable is tripped over. This saves your port from sudden stress.
Keep the Port Clean
Check your port monthly. Use a toothpick or compressed air to remove dust. A clean port ensures a solid connection.
Avoid Charging in Bed or on Soft Surfaces
Charging on a blanket or pillow pushes the plug at an angle. This puts lateral pressure on the port. Over time, this loosens the solder joints. Always charge on a hard, flat surface.
Invest in a Quality Charger
Cheap third-party chargers often have poorly molded plugs. They do not fit snugly. A loose fit causes arcing and heat, which damages the port. Stick with OEM or reputable brands like Anker or Belkin.
Consider a Docking Station
If you use your laptop at a desk, a docking station is a smart investment. You plug the dock into your laptop once. All peripherals and power connect through the dock. This reduces wear on the charging port to near zero.
For more signs that your laptop needs attention, check out this resource from HP on 10 ways to know you need laptop repair. It covers symptoms beyond just the charging port.
A loose charging port is annoying, but it is rarely the end of your laptop. Diagnose the issue correctly. Try a temporary fix if you need to. Then decide whether to DIY or call a pro. With the right approach, you can have your laptop charging reliably again without breaking the bank.