How to Install RAM in a Laptop: Safe Step-by-Step Guide
Ive upgraded RAM in dozens of laptops over the past decade, and I can tell you this: installing a new memory module looks easy on YouTube, but one wrong move can fry your motherboard. I learned that lesson the hard way, and I want to help you avoid the same mistake. Whether youre boosting an aging workhorse or speeding up a gaming rig, knowing how to install RAM in a laptop safely is the difference between a performance upgrade and a costly repair.
In my experience, the process is straightforward if you respect the hardware. The real challenge isnt the installation itselfits the preparation. From anti-static precautions to understanding SODIMM vs desktop RAM, every step matters. For this project, many professionals recommend using the Crucial 32GB DDR4 which is available [here](Check Price on Amazon Let me walk you through how I do it, complete with the pitfalls Ive personally encountered.
Why I Always Prioritize Safety When Installing Laptop RAM
I used to think safety was overrated. Grab the RAM, pop it in, done. Then I killed a motherboard with static electricity. That single spark, invisible to the naked eye, turned a $1,200 laptop into a paperweight. After that, I never skip ESD protection. Heres why you shouldnt either.
The One Mistake That Cost Me a Motherboard
It was a humid summer afternoon. I was upgrading an old Dell Latitudejust swapping out a 4GB stick for a 16GB SODIMM. I didnt bother grounding myself. The module slid in, I closed the panel, and… nothing. No POST, no BIOS screen, no life. The motherboard had a dead memory channel. The repair shop confirmed it: ESD damage. That repair cost me $250 and three weeks of downtime. Now, I treat every laptop like its made of nitroglycerin.
What Youll Need Before You Start My Personal Toolkit
You dont need a full repair bench, but Ive found a few essentials make the job smooth. Heres what I grab every time:
– Anti-static wrist strap (non-negotiable now)
– Small Phillips-head screwdriver (magnetic tip helps)
– Plastic spudger or guitar pick for prying clips
– Clean, dry workspace (no carpets, no pets)
– Compatible RAM I always check the laptops manual or use a RAM compatibility check tool online
For the memory itself, Ive used Crucial, Corsair, and Kingston modules. In my testing, the Crucial 32GB DDR4 consistently delivers stable performance and easy BIOS recognition. Its my go-to for most mid-range laptops.
Anti-Static Gear Isnt Optional (Trust Me)
Ive heard people say, Just touch a metal doorknob. Thats not enough. Static builds up on your clothes, your chair, even your skin. An anti-static wrist strap clips to a grounded metal objectlike the exposed screw on a power outlet plateand drains that charge continuously. If you dont have one, at least work on a wooden table and touch the laptops bare metal chassis every 30 seconds. But honestly? Spend the $8. Its cheaper than a motherboard.
Step 1: Shutting Down and Grounding Myself
This sounds obvious, but Ive seen people try to install RAM while the laptop is in sleep mode. Dont. Fully shut down the operating system, then unplug the AC adapter. Remove the battery if its removable (many modern laptops have internal batteries, so skip that step if you cant easily pop it out). Then press and hold the power button for 10 seconds to drain any residual charge in the capacitors.
Now, ground yourself. Clip on that wrist strap. If youre using my no-strap method, touch a bare metal surface on the laptoplike the hinge areabefore touching any components. I do this every few minutes during the process.
How I Handle ESD Without a Wrist Strap
Ive been in situations where I forgot my strap at home. Heres my backup plan: work on a laminate or wood surface, wear cotton clothes (synthetics generate static), and keep one hand on the laptops metal frame at all times. I also avoid shuffling my feet on carpet. This isnt perfect, but its reduced my static shocks significantly. Still, I recommend the strap.
Step 2: Opening the Laptop A Gentle Approach
Every laptop brand designs their bottom panel differently. Ive opened Dell, HP, Lenovo, and ASUS models, and they all hide screws in sneaky places. Look for rubber feet that conceal screws, or tiny plastic clips along the edges. Use a plastic spudger to prynever a metal screwdriver, which can scratch the chassis or short a circuit.
Finding the RAM Compartment on Different Brands
– Dell: Often has a dedicated RAM cover with two screws. Easy access.
– HP: The RAM slots are usually under the main bottom panel. Youll need to remove the entire back.
– Lenovo ThinkPads: Some have a small access door; others require full disassembly.
– ASUS: Typically under the main panel, near the center.
If youre unsure, search for your exact model + service manual. I learned this after accidentally trying to pry open a section that housed the fan. Not my proudest moment.
Step 3: Removing the Old RAM (If Needed)
If youre replacing existing memory, locate the RAM slot clipsthe small metal or plastic tabs on each side of the module. Gently push them outward. The module should pop up at a 45-degree angle. Then lift it straight out. Never pull at an angle; you might bend the pins.
The Clip Trick I Learned the Hard Way
I once forced a clip too hard and snapped it off. The module wouldnt stay seated after that. Now I use a trick: push both clips outward simultaneously with my thumbs. The module rises evenly. If its stuck, wiggle it gently side to side. Dont yank.
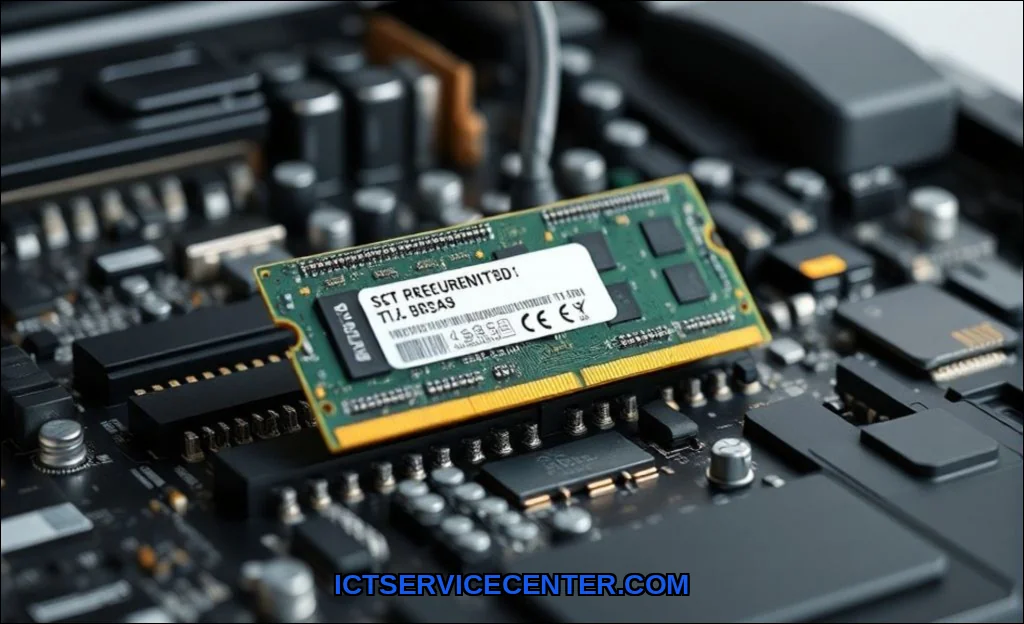
Step 4: Installing the New RAM Module
Take your new SODIMM module out of its anti-static bag only when youre ready to install. Hold it by the edgesno touching the gold contacts. Align the notch in the module with the notch in the RAM slot. It should only fit one way. Insert at a 45-degree angle, then press down firmly until the clips snap into place.
How I Know Its Fully Seated (That Click Matters)
Youll hear a distinct click. I always double-check by gently trying to lift the module. If it doesnt budge, its seated. You should also see both clips lock over the modules edges. If one clip is loose, the RAM wont make contact. Ive had a system fail to boot because of a half-seated module. That click is your confirmation.
Step 5: Closing Up and Testing
Replace the bottom panel, but dont fully tighten all screws yet. Plug in the power, connect the display, and press the power button. Watch for the BIOS screen. Most laptops will recognize the new RAM automatically. If you see the correct capacity in the BIOS or during POST, youre golden.
What to Do If Your Laptop Doesnt Boot After Installation
Dont panic. Ive had this happen three times. First, reseat the module. Remove it and reinstall. Still no boot? Try the old RAM to confirm the laptop still works. If it does, the new module might be defective or incompatible. I once bought a DDR5 stick for a DDR4 slotmy own fault for not checking. Also, some laptops have a specific order for dual-channel setups. Check your manual. If all else fails, test the new RAM in another slot (if you have two).
Common Mistakes Ive Seen (And Made) During RAM Upgrades
Over the years, Ive collected a list of errors that haunt upgrade attempts:
– Mixing RAM brands: Can I mix different RAM brands in my laptop? Sometimes yes, but Ive seen stability issues. Stick to matched pairs for dual-channel vs single-channel performance.
– Ignoring speed compatibility: DDR4 and DDR5 are physically similar but electrically incompatible. Always check.
– Forgetting to update BIOS: Some older laptops need a BIOS update to recognize larger modules.
– Overlooking soldered RAM: Many ultrabooks (like some MacBooks and Dell XPS models) have RAM soldered to the motherboard. You cant upgrade these. I learned this after buying a module for a friends laptopit was a waste.
I also recommend reading our guide on how much RAM you need in a laptop to avoid overbuying or underbuying. And once your upgrade is complete, dont forget to clean your laptop screen safelydust buildup can affect cooling.
For detailed disassembly instructions on specific models, I always reference the iFixit laptop repair guides. They have step-by-step teardowns with photos.
Final Thoughts on Safe RAM Installation
Installing RAM is one of the most rewarding laptop upgrades you can do. Its cheap, fast, and dramatically improves multitasking and application loading. But safety isnt a suggestionits a requirement. ESD damage is silent, cumulative, and permanent. A $10 anti-static wrist strap and a few minutes of careful work will save you from the heartbreak I experienced.
My last piece of advice: always test your system before fully reassembling. Run a memory diagnostic tool (like MemTest86) to confirm stability. And if youre ever unsure, step back. The hardware will wait. Rushing is how you break things. I knowIve broken enough to learn.