Framing metal prints involves selecting the right frame and using a mounting technique to secure the print. Metal prints can be framed by selecting a frame that complements the artwork and using a method such as float mounting or hinging to secure the print.
With the right frame and mounting technique, you can enhance the visual appeal and protect the metal print for long-lasting enjoyment. Here are some key steps to follow when framing metal prints.

Choosing The Right Frame For Your Metal Print
Choosing the right frame for your metal print is crucial for enhancing its visual appeal. Consider the design of the print, the style of your space, and the desired aesthetic to find the perfect frame that complements and protects your artwork.
When it comes to choosing a frame for your metal print, there are several factors to consider. The frame you select can have a significant impact on the overall aesthetic of your artwork, so it’s essential to make the right choice.
Here are some factors to keep in mind:
- Frame Material: The material of the frame can enhance the visual appeal of your metal print. Consider options such as wood, aluminum, or acrylic, each providing a unique look and feel.
- Color and Finish: The color and finish of the frame should complement the colors and style of your metal print. Opt for a frame that enhances the visual impact without overpowering the artwork.
- Design and Style: Choose a frame that matches the overall design and style of your space. Whether you prefer a modern, minimalistic, or traditional look, there are frames available to suit your preferences.
- Size and Proportion: The frame’s size should be proportionate to the metal print to ensure a balanced and visually pleasing display. Take accurate measurements of your artwork before choosing a frame.
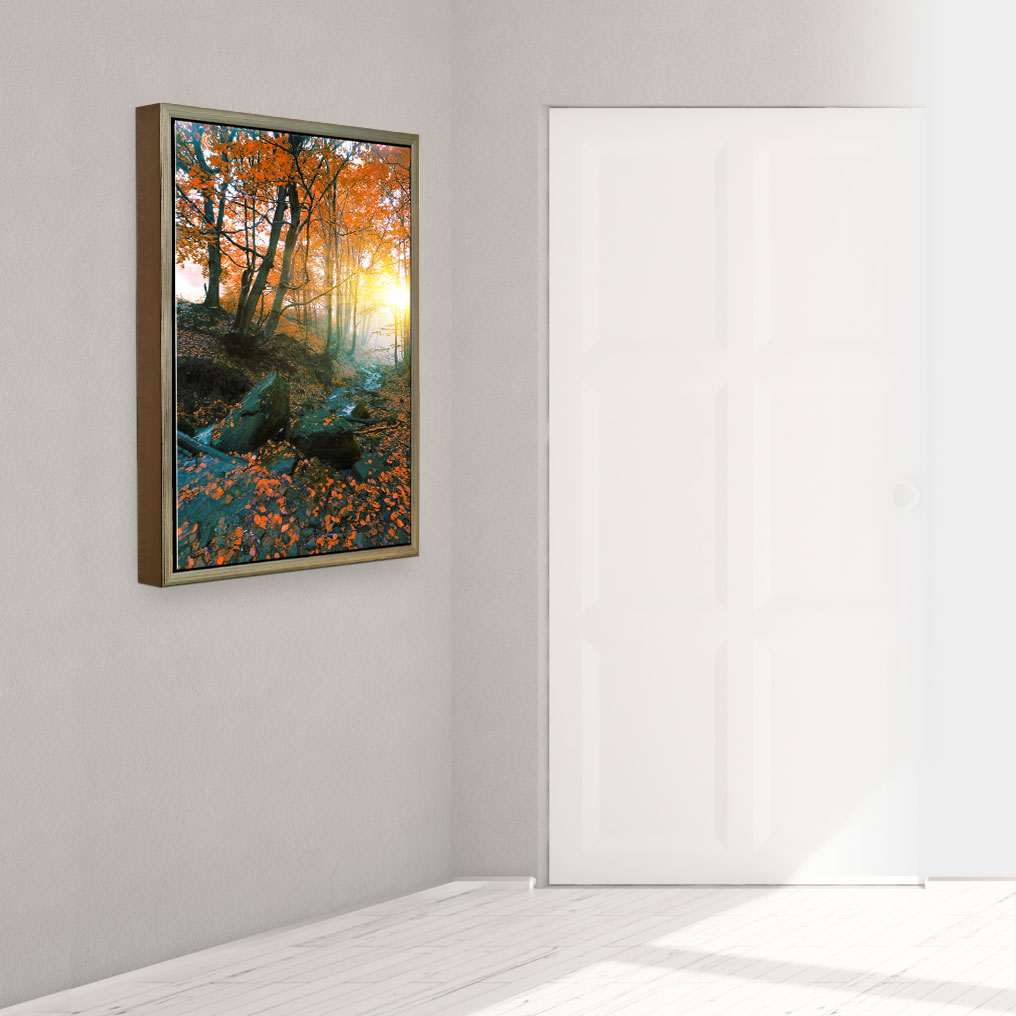
- Mounting Options: Consider how you want to mount your metal print. Some frames offer different mounting techniques, such as floating or recessed mounts, which can add depth and dimension to your artwork.
- Conservation and Protection: Ensure that the frame you select provides adequate protection for your metal print. Look for frames with UV-resistant glass or acrylic to prevent fading and damage over time.
The impact of frame choice on the overall aesthetic is undeniable. The right frame can enhance the colors, details, and visual appeal of your metal print, creating a stunning display. By considering the factors mentioned above, you can select a frame that not only showcases your artwork but also complements your space’s style and ambiance.
Preparing Your Metal Print For Framing
Learn how to properly prepare your metal prints for framing with these simple steps. From cleaning the surface to choosing the right frame, this guide will ensure your metal prints look stunning on display.
Metal prints are a modern and sleek way to display your favorite photos or artwork. However, before you can frame your metal print, there are a few steps you should take to ensure it is ready for display. In this section, we will guide you through the process of cleaning the surface of the metal print and applying protective coatings if desired.
Cleaning The Surface Of The Metal Print:
- Gently wipe the surface of the metal print using a soft, lint-free cloth. This will remove any dust or smudges that may have accumulated during handling or storage.
- If there are stubborn stains or marks on the print, use a mild soap solution and a soft sponge to gently clean the surface. Avoid using harsh chemicals or abrasive materials, as these can damage the print.
- Rinse the metal print thoroughly with clean water to remove any soap residue. Make sure to pat it dry with a clean cloth to prevent water spots.
Applying Protective Coatings If Desired:
- Some metal prints come with a protective coating already applied, but if not, you may choose to add one yourself for extra durability and longevity.
- Clear acrylic coatings are a popular choice as they provide a glossy finish and protect the print from UV rays, moisture, and scratches. To apply the coating, spray it evenly over the surface of the metal print, holding the can about 12 inches away. Allow it to dry completely before handling.
- If you prefer a matte finish, you can opt for a matte varnish instead. Follow the instructions on the product for proper application.
- Protective coatings not only preserve the image quality but can also enhance the colors and contrast of the print.
Remember, cleaning and applying protective coatings should be done with care to avoid damaging the metal print. By following these steps, you can ensure that your metal print is ready to be framed and displayed for all to admire.

Mounting Your Metal Print In The Frame
Mounting your metal print in the frame is a simple process that ensures a secure and professional display. Follow these easy steps to frame metal prints and showcase your artwork or photographs with confidence.
Step-By-Step Guide To Securely Mount The Print
Mounting your metal print in the frame requires careful precision and the right tools to ensure a secure and damage-free display. Follow this step-by-step guide to achieve the perfect mount for your metal print:
Gather The Necessary Tools And Materials:
- Quality frame: Choose a frame that is suitable for metal prints and complements the artwork.
- Mounting tape or adhesive: Opt for acid-free and archival quality tape or adhesive to prevent damage to the print over time.
- Soft cloth or gloves: Protect the print from fingerprints and smudges by wearing gloves or using a soft cloth when handling it.
- Screwdriver: If your frame requires screws for assembly, have a screwdriver on hand.
Prepare The Frame:
- Remove the backing: Carefully remove the backing from the frame by taking out any screws or tabs holding it in place.
- Clean the frame: Use a soft cloth to wipe away any dust or debris that may have accumulated on the frame.
Position The Metal Print:
- Place the print face down on a clean, flat surface.
- Measure and mark the center of the print and the frame to ensure accurate alignment.
Apply The Mounting Tape Or Adhesive:
- Cut four 2-inch strips of mounting tape or adhesive.
- Attach the tape/adhesive to the corners of the print, ensuring equal distance from the edges.
- Remove the backing from the tape/adhesive.
- Carefully position the print in the center of the frame, aligning it with the marked center points.
Secure The Print In The Frame:
- Gently press the corners of the print onto the frame.
- Apply light pressure to the entire surface of the print, ensuring it adheres evenly.
- If your frame requires screws, use a screwdriver to secure the frame backing in place.
Check For Any Imperfections:
- Inspect the mounted metal print for any air bubbles or misalignments.
- If necessary, carefully lift the print and repeat the mounting process, ensuring a smooth and even display.
Hang Or Display Your Mounted Metal Print:
- Once you are satisfied with the mount, hang the frame on the wall or display it on a tabletop.
- Avoid placing the print in direct sunlight or areas with high humidity to prevent damage.
Remember, proper mounting of your metal print not only enhances its visual impact but also ensures its longevity. Use these techniques and take your time to create a gallery-worthy display that will impress all who see it.
Customizing Your Frame For A Personal Touch
Personalize your metal prints by customizing your frame for a unique touch. Enhance the beauty of your artwork with a tailored frame that reflects your individual style and complements the metal print perfectly.
When it comes to framing metal prints, the options are endless. Customizing your frame adds a personal touch to your artwork and allows you to showcase your unique style and complement the print. In this section, we’ll explore two ways to customize your frame: adding matting to enhance the artwork and experimenting with different frame styles and colors.
Adding Matting To Enhance The Artwork:
- Matting refers to the border between the metal print and the frame. It acts as a buffer, visually separating the artwork from the frame and providing a polished look. Here’s why adding matting can enhance your metal print:
- Accentuate colors and details: Choosing a matting color that complements or contrasts with the artwork can draw attention to specific colors or details within the print.
- Create depth and dimension: By adding a matting border, you introduce a visual break between the artwork and the frame, creating depth and making the print stand out.
- Protection and preservation: Matting helps prevent the metal print from directly touching the glass or acrylic, reducing the risk of damage over time.
Experimenting With Different Frame Styles And Colors:
- With a wide range of frame styles and colors available, you can truly make your metal print unique. Here are some ideas to inspire your customization:
- Sleek and modern frames: Opt for a minimalist frame with clean lines, such as a thin metal frame or a sleek black frame, to create a contemporary look.
- Ornate frames for elegance: If you prefer a more traditional or elegant touch, consider frames with intricate designs or decorative elements. These frames can add a touch of luxury to your metal print.
- Bold and vibrant frames: Stand out from the crowd by choosing a frame in a bold color or a vibrant metallic finish. This option works well for adding a pop of color to your artwork or creating a statement piece.
- Mix and match frames: Don’t be afraid to mix different frame styles and colors for a more eclectic and personalized display. Experiment with different combinations to find the perfect balance for your metal print.
By customizing the frame of your metal print, you can elevate the overall presentation and make it a true reflection of your style and creativity. Whether you choose to add matting or experiment with different frame styles and colors (or both! ), the result will be a truly personalized piece of art that will make a statement in any space.
Hanging And Displaying Your Framed Metal Print
Learn how to hang and display your framed metal print with these simple steps. From choosing the right location to mounting options, this guide will help you showcase your metal print with style.
Determining The Best Location For Your Print
When it comes to hanging and displaying your framed metal print, choosing the right location is essential. Here are some factors to consider:
- Lighting: Find a spot where your metal print can shine. Avoid placing it in direct sunlight that may cause glare or fading. Opt for a well-lit area that showcases the vibrant colors and details of your artwork.
- Wall Space: Consider the size of your metal print and the available wall space. Look for a wall that can accommodate the dimensions and complements the overall aesthetics of the room.
- Room Ambience: Think about the atmosphere you want to create in the space. Choose a location that harmonizes with the room’s style and enhances its overall vibe.
- Eye Level: Hang your metal print at eye level or slightly above for optimal viewing. This ensures that the artwork is easily seen and appreciated by everyone in the room.
- Focal Point: Make your metal print the centerpiece of the room by placing it where it naturally draws attention. Consider its subject matter and color scheme when selecting the location.
Properly Securing The Frame To The Wall
Now that you’ve determined the best location for your framed metal print, it’s crucial to ensure that it is properly secured to the wall. Follow these steps for a secure display:

- Gather the Tools: You will need a drill, appropriate wall anchors, screws, and a level to ensure a straight alignment.
- Mark the Location: Use a pencil to mark the desired placement of your metal print. Double-check the alignment using a level before proceeding.
- Install Wall Anchors: Depending on your wall type, choose the appropriate wall anchors. Use a drill to create holes for the anchors.
- Attach the Frame: With the wall anchors in place, carefully align the frame with the holes. Insert screws through the mounting holes and tighten them into the anchors.
- Check Stability: Once the frame is securely attached, gently tug on it to ensure it is stable. If necessary, make any adjustments or seek professional assistance for added stability.
Remember, proper installation is crucial both for the safety of your metal print and the longevity of the display. Take your time, follow the manufacturer’s instructions, and ensure that the frame is securely mounted on the wall.
Caring For Your Framed Metal Print
Whether you’re showcasing a treasured memory or displaying a beautiful piece of art, hanging and displaying your framed metal print correctly enhances its visual impact and adds a touch of sophistication to any space.
Credit: www.metalprints.com
Learn how to care for your framed metal print with these essential tips. Keep your metal print looking brand new by avoiding direct sunlight, cleaning with a soft cloth, and preventing contact with moisture.
Framed metal prints are a modern and sleek way to display your favorite photographs or artworks. Not only do they add a contemporary touch to any space, but they also require minimal maintenance to keep them looking their best. Caring for your framed metal print involves cleaning and maintaining the frame, as well as protecting the print from humidity and UV damage.
In this section, we will explore these essential aspects of preserving the beauty and longevity of your metal print.
Cleaning And Maintaining The Frame:
- Dust the frame regularly using a soft, lint-free cloth. Gently wipe away any accumulated dust or dirt, taking care not to scratch the surface.
- If the frame requires deeper cleaning, dampen the cloth with a mixture of mild soap and water. Wipe the frame in a gentle, circular motion, and then dry it thoroughly to prevent water spots.
- Avoid using harsh chemicals or abrasive cleaners, as they can damage the frame’s finish. Stick to mild soap solutions or products specifically designed for metal frames.
- Check the frame for any loose or damaged corners or screws. If you notice any issues, tighten the screws or seek professional assistance for repairs.
Protecting The Print From Humidity And Uv Damage:
- Keep your framed metal print away from areas with excessive moisture or humidity, such as bathrooms or kitchens. Moisture can cause warping or discoloration of the print.
- Avoid exposing the metal print to direct sunlight or harsh artificial lighting. Over time, UV rays can fade the colors and damage the print. Choose a location where the print is shielded from direct light or use UV-protective glass for added defense.
- Consider using a dehumidifier or humidity-absorbing packets in areas prone to high humidity levels. This extra precaution can help maintain an optimal environment for your metal print.
- If you’re planning to store or transport the framed metal print, wrap it in acid-free tissue paper or a soft cloth to protect it from scratches or other physical damage. Keep it in a cool, dry place to prevent any moisture-related issues.
By following these simple cleaning and maintenance tips, as well as taking precautions against humidity and UV damage, you can ensure that your framed metal print remains in pristine condition for years to come. Enjoy the stunning visual impact and durability that metal prints offer, and showcase your cherished memories or artistic creations with confidence.
Framing Alternatives For Metal Prints
Discover the best framing alternatives for metal prints, providing an elegant touch to showcase your vibrant artwork. Enhance the visual appeal with stunning frames that perfectly complement your metal prints, elevating their overall presentation.
Metal prints offer a unique and modern way to display your favorite photos or artwork. While the sleek and minimalist look of a metal print can stand alone as a stunning piece of wall decor, you may also want to consider framing options to enhance its appearance and protect it.
In this section, we will explore other framing methods such as floating frames and discuss the pros and cons of different framing options for metal prints.
Exploring Other Framing Methods Such As Floating Frames:
- Floating frames: A popular choice for framing metal prints, floating frames create the illusion that the artwork is suspended within the frame. This method involves mounting the metal print onto a backboard, leaving a small gap between the print and the frame itself. The result is a contemporary and elegant display that showcases the artwork without any visible borders or distractions.
- Deep-set frames: These frames have a depth that allows the metal print to sit further back, adding a sense of dimensionality and creating a captivating shadow effect. This method works particularly well for metal prints with intricate details or textures, as it adds depth and visual interest to the overall presentation.
- Shadow box frames: Shadow box frames are a popular choice for framing three-dimensional metal prints or those with unique shapes. These frames have a deeper profile that can accommodate the thickness of the metal print, allowing it to be displayed in a visually appealing way that draws attention to its unique qualities.
Pros And Cons Of Different Framing Options:
- Floating frames:
- Pros:
- Enhances the modern and minimalist look of a metal print.
- Creates a sense of depth and dimensionality.
- Allows the artwork to stand out without any visible borders.
- Cons:
- Requires additional mounting and assembly.
- May be more expensive compared to other framing options.
- Deep-set frames:
- Pros:
- Adds depth and visual interest to the metal print.
- Creates a captivating shadow effect.
- Ideal for showcasing intricate details or textures.
- Cons:
- Requires careful consideration of the print’s dimensions to ensure a proper fit.
- May limit the viewing angle due to the added depth.
- Shadow box frames:
- Pros:
- Suitable for three-dimensional or uniquely shaped metal prints.
- Provides a visually appealing display that highlights the artwork’s unique qualities.
- Offers additional protection for delicate or fragile metal prints.
- Cons:
- Tends to be bulkier and may require more wall space.
- Can be more expensive than other framing options.
When choosing a framing option for your metal print, consider the overall aesthetic you wish to achieve, the intended location for display, and your personal preferences. Each framing method has its own merits, so take the time to explore and find the one that best complements your metal print and enhances its visual impact.
Showcasing Your Framed Metal Prints
Discover the art of framing metal prints with our expert tips and tricks. Showcase your unique metal prints in a stylish and professional manner, adding a touch of elegance to any space.
Metal prints offer a unique and modern way to display your favorite photographs and artwork. The sleek and glossy nature of these prints adds a touch of sophistication to any space. When it comes to showcasing your framed metal prints, there are several creative ways to make them the center of attention in your home decor.
Here are some ideas to get you started:
- Wall Collage:
- Create a visually striking display by arranging multiple metal prints together on a wall. Mix and match different sizes and orientations to add intrigue.
- Experiment with various layouts to find the arrangement that best complements your space. For instance, try a symmetrical grid for a clean and organized look, or an organic cluster for a more eclectic feel.
- Gallery Wall:
- Transform a blank wall into a gallery-style display by combining framed metal prints with other types of artwork, such as paintings or illustrations.
- Vary the sizes, colors, and styles of frames to create an eye-catching composition. Consider using a mix of metal, wood, and acrylic frames for added visual interest.
- Standalone Statement Piece:
- Choose a large metal print that incorporates a stunning photograph or artwork and make it the focal point of a room.
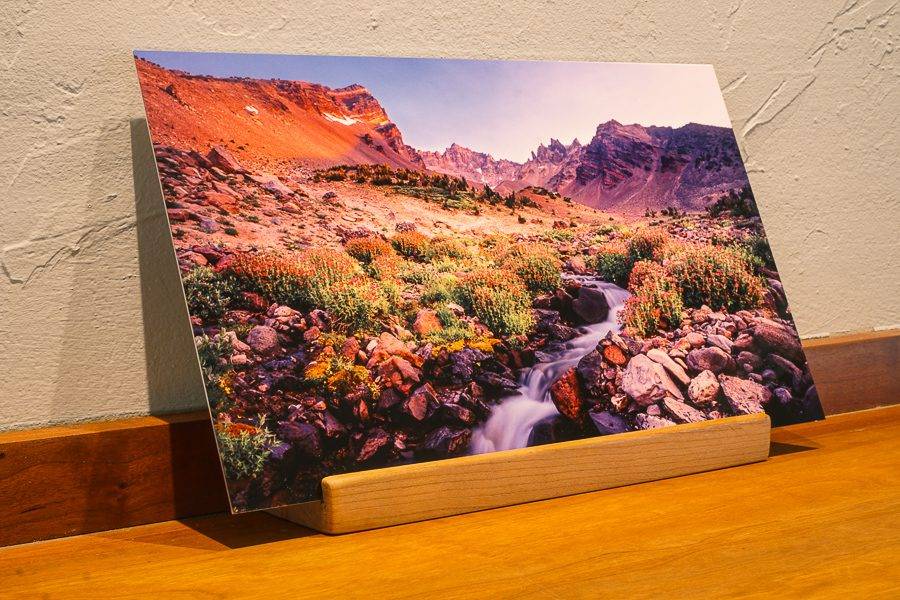
- Lean it against a wall or display it on a floating shelf to create a striking visual impact. The reflective surface of the metal print will add depth and dimension to the space.
- Mixed Media Display:
- Incorporate metal prints into a gallery wall that includes other decorative elements, such as mirrors, typography, or decorative objects.
- Experiment with layering different textures and materials to create a visually captivating and dynamic display.
- Rotating Gallery:
- Switch up the framed metal prints on display periodically to keep your decor fresh and engaging.
- Create a designated area, such as a hallway or a focal wall, where you can easily swap out prints and showcase new ones regularly.
Incorporating metal prints into your home decor is a fantastic way to infuse a contemporary and artistic vibe into your space. By exploring various display options, you can create a visually stunning environment that showcases your framed metal prints to their fullest potential.
Whether you opt for a wall collage, a gallery wall, or a standalone statement piece, these tips will help you transform your space into a captivating art gallery.
Frequently Asked Questions For How To Frame Metal Prints
How To Frame Metal Prints?
To frame metal prints, choose a frame that complements the artwork, like a sleek metal frame for a modern look. Use adhesive strips or a wire hanging kit to securely mount the print. Make sure the frame is sturdy and properly aligned to display the print beautifully.
Can Metal Prints Be Framed Without Glass?
Yes, metal prints can be framed without glass. Metal prints have a durable, scratch-resistant surface that doesn’t require glass for protection. Not using glass allows the vibrant colors and metallic sheen of the print to be fully visible and adds a contemporary touch to the display.
What Are The Benefits Of Framing Metal Prints?
Framing metal prints offers several benefits. It enhances the print’s appearance, provides added protection, and allows for easy hanging. Metal frames are lightweight, durable, and resistant to warping, making them ideal for displaying metal prints. The frame also acts as a decorative element, accentuating the artwork’s beauty.
How To Choose The Right Frame For Metal Prints?
When choosing a frame for metal prints, consider the style, color, and size that best complement the artwork. Opt for frames made of lightweight metals like aluminum or stainless steel. The frame should securely hold the print and have hardware for easy hanging.
Select a frame that enhances the overall aesthetic of the artwork.
Conclusion
Framing metal prints is a wonderful way to showcase your favorite photos and artwork. With its sleek and modern look, metal prints add a unique touch to any space. To frame metal prints like a pro, remember to choose the right size and style of frame that complements the artwork.
Ensure the prints are securely mounted to prevent any damage or warping. Use acid-free and archival materials to protect the metal prints from fading or discoloration over time. Lastly, consider the placement of the framed metal prints to maximize their visual impact.
Whether displayed in your home, office, or gallery, framed metal prints are sure to captivate viewers and leave a lasting impression. So go ahead, get creative, and start framing your metal prints with confidence!

